


Case Study
1. Introduction
1.1 What is Maestro?
The rise of serverless architectures and FaaS offerings such as AWS Lambda has revolutionized how companies are developing modern apps. The need for an orchestration layer over these architectures has brought about services such as AWS Step Functions. However, deploying apps that use Step Functions can be tedious and error-prone. Maestro prioritizes speed and developer productivity by automating this process so that the developer’s focus stays on developing their application’s business logic.
Maestro is an open-source, easy-to-use framework for deploying serverless workflows using Node.js® and AWS Step Functions. Using Maestro aids development not only in the initial phase of a project but throughout the ongoing maintenance as well.
2. Serverless
The popularity of developing applications with a serverless approach is relatively new. The term “serverless“ seems to imply that servers are not involved in an application’s architecture, but that’s not accurate. The reason for the term “serverless“ is not because there’s an absence of servers, but because the control of the servers has been abstracted away and made the responsibility of the cloud provider. So from the perspective of the developer, there’s less need to worry about maintaining and scaling servers, effectively making their architecture serverless.
Besides being a bit of a misnomer, the term “serverless“ is also a bit overloaded. It encompasses a few different ideas. One of these is what is known as Function as a Service (FaaS), or serverless functions.
2.1 FaaS
Serverless functions are meant to be small pieces of application code that are provisioned in response to some event. Once the event fires, a container is spun up in which the function will execute. After execution, the container will remain idle for a short amount of time in case there are further invocations of the function. If not, the container is torn down. This facilitates scaling up and down according to demand and only paying for the resources that are used. FaaS is so prevalent in serverless architectures that it is often equated with the term “serverless“ itself.

2.2 AWS Lambda
We’ll be limiting our discussion to a specific cloud provider, Amazon Web Services (AWS), as it is by far the most popular provider at this time.
Amazon’s FaaS offering is known as AWS Lambda. Lambdas are deployed on containers that support runtimes in seven languages [2]. Lambdas can be invoked by many AWS services including other Lambdas. They have a limited execution of 15 minutes, and any state associated with the execution is then lost.

2.3 Serverless Patterns
As serverless development is still relatively new, best practices have yet to be firmly established. However, there are helpful patterns that have emerged as developers continue to work with serverless.
For example, when a Lambda is initially invoked, its container will have to be spun up, usually taking a few hundred milliseconds. This is often referred to as a “cold start”. To address this issue, there is a pattern called the ‘Function Warmer’, which keeps the Lambda’s container available for further invocations. Patterns for working with serverless can be grouped into five categories [3].
- Availability
- Event Management
- Communication
- Authorization
- Orchestration
We’ll be focusing our attention on this last group of patterns: Orchestration.
3. Orchestration
Serverless orchestration is the act of managing the workflow between multiple serverless resources. To visualize what this might look like, let’s consider a hypothetical situation. Let’s say that we’ve been assigned a project to create an internal application for our company. The app will allow an employee to send a request to their manager, asking that a certain resource be provisioned. If the manager approves, the resource is provisioned and the employee is granted access. Otherwise, the employee is notified that their request has been denied.

Let’s say that the workflow can be implemented by representing each component as a Lambda. The work of each Lambda must then be orchestrated to ensure that the workflow executes in a meaningful way. How will we make sure this workflow proceeds as desired?
Let’s assume the ‘Manager’ Lambda will receive an input that contains information about the resource being requested. What happens if that input is somehow malformed? An error could occur leading to the ‘Manager’ failing. Some form of error handling could prevent this, but should the ‘Manager’ validate its own input?
3.1 Orchestration Patterns
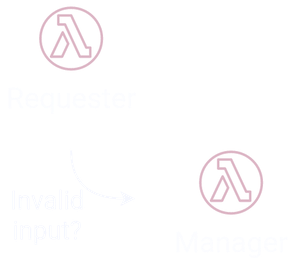
We could introduce a component that has the single responsibility of validating input. This would provide a clear separation of concerns and would prevent the ‘Manager’ from failing. A common orchestration pattern that could be helpful here is known as the ‘Proxy’ [3]. The ‘Proxy’ is a Lambda that sits between two other Lambdas and invokes the second one when appropriate. In this case, we could insert a ‘Proxy’ Lambda called ‘Validator’ to help handle invalid inputs.

Next, we need to determine how to properly branch based on the ‘Manager’ Lambda’s output.

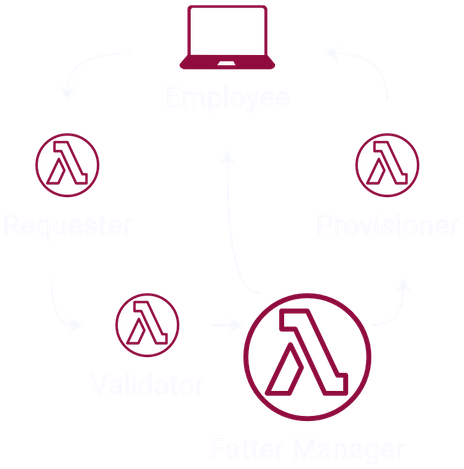
There’s another pattern we could use called the ‘Router’, which simply distributes the execution based on payload [3]. Since the ‘Manager’ Lambda can invoke other Lambdas, we can implement the ‘Router’ pattern by placing the branching logic there. Because we’ve now written orchestration logic alongside business logic, we’ll affectionately refer to the ‘Manager’ as the ‘Fat Manager’.

Now that we’ve taken care of branching, an attempt to provision the desired resource can be made. However, the provisioning of a resource may be risky. What if the attempt fails for some reason?

We’d like to prevent the employee from having to repeat their request such that the workflow has to start over. To address this, we could once again apply the ‘Router’ pattern. This time, we’ll add logic to the ‘Manager’ so that it monitors the output of the ‘Provisioner’. If the ‘Manager’ detects that the provisioning has failed, we can have it invoke the ‘Provisioner’ again. But how many retries do we want to allow? How quickly do we want to retry? This is further orchestration logic that we’ll have to write into the ‘Manager’, making it even fatter.

Do any limitations exist with this implementation? The probability of the Lambda surpassing its execution limit is now increased if the ‘Manager’ monitors the ‘Provisioner’ and there are multiple retries. Delayed provisioning may cause the ‘Manager’ to terminate before determining if a retry was necessary. Further, with the orchestration logic of the ‘Manager’ written alongside the business logic, the component is overloaded resulting in poor separation of concerns.
The consequences of not separating concerns would be felt every time it’s necessary to iterate on the workflow. Business logic as well as orchestration logic may need to be evaluated and adapted for the application to grow.
Perhaps refactoring is in order. Maybe it would be wise to extract the orchestration logic to a separate component other than the ‘Manager’. If that intuition seems natural, can more be done?
Why not extract out an entire orchestration layer? The result would be a thin workflow of strictly business logic resembling the original workflow. The orchestration logic would be entirely on its own.

By implementing the application in this way, we’re able to orchestrate error handling, retry, and branching all in one place. When the business logic needs to be modified, the orchestration logic can likely stay the same. This can be quite valuable for a new application or one that simply hasn’t reached a stable state.
So how would we go about extracting an orchestration layer? Creating and maintaining custom logic would require considerable overhead. Let’s look at another pattern called the ‘State Machine’ [3] to see whether it might be suitable for our needs.
3.2 The State Machine Pattern
"State machines are really just a mathematical way of modeling an application.…[With state machines,] you can describe your application as a mixture of your inputs, the states that your application can be in, and the transitions between those states."
It’s important to note that a state machine is not a physical device but an abstract concept. A state machine is all about inputs, outputs, transitions, and state, making it an ideal candidate for an orchestration layer. But how would we go about implementing a state machine? It just so happens that AWS offers a “State Machine as a Service” called AWS Step Functions.
4. AWS Step Functions
“AWS Step Functions is a web service that enables you to coordinate the components of distributed applications and microservices using visual workflows. You build applications from individual components that each perform a discrete function, or task, allowing you to scale and change applications quickly.”

Step Functions are designed to contain an application’s orchestration logic. This helps us to maintain the separation of concerns that we mentioned earlier. To create a state machine with Step Functions, we’ll need to use the JSON-based language called Amazon States Language (ASL).
4.1 Amazon States Language
Let’s first look at a “Hello World” state machine definition to familiarize ourselves with ASL.
{
  "StartAt": "Hello World",
  "States": {
    "Hello": {
      "Type": "Task",
      "Resource": "arn:aws:lambda:REGION:ACCOUNT_ID:function:hello",
      "Next": "World"
    },
    "World": {
      "Type": "Task",
      "Resource": "arn:aws:lambda:REGION:ACCOUNT_ID:function:world",
      "End": true
    }
  }
}

There are two top-level fields required for all state machines:
StartAt and States. The
StartAt field simply designates which state will begin
execution, whereas the States field is a list of all
possible states. Once a valid definition is entered in the AWS
Management Console, a visual that represents the state machine will be
displayed.
A state‘s type dictates the additional attributes that the state can have. There are eight different state types given to us by ASL.
TaskParallelMapPassWaitChoiceSucceedFail
The Task type allows a state to reference a Lambda
function. This is done by setting the state‘s
Resource field to the Lambda‘s Amazon Resource Name
(ARN). We see that the “Hello World” example has two
Task states: Hello and World,
each of which points to a different Lambda. When
Hello returns, its output is passed as input to the next
(and last) step in the execution, World.
The other state types do not map to Lambda functions but help with
workflow orchestration. For example, the Choice state
enables branching logic and the Wait state will pause
execution for some specified amount of time.
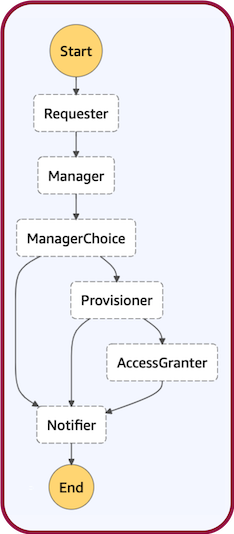
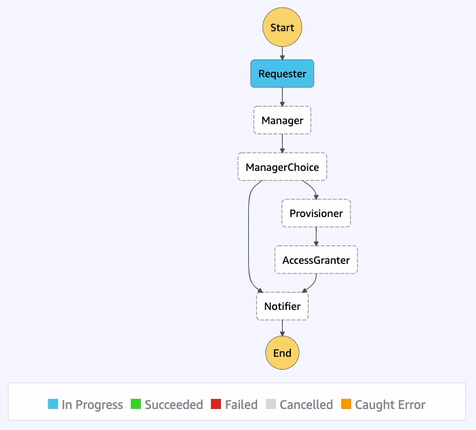
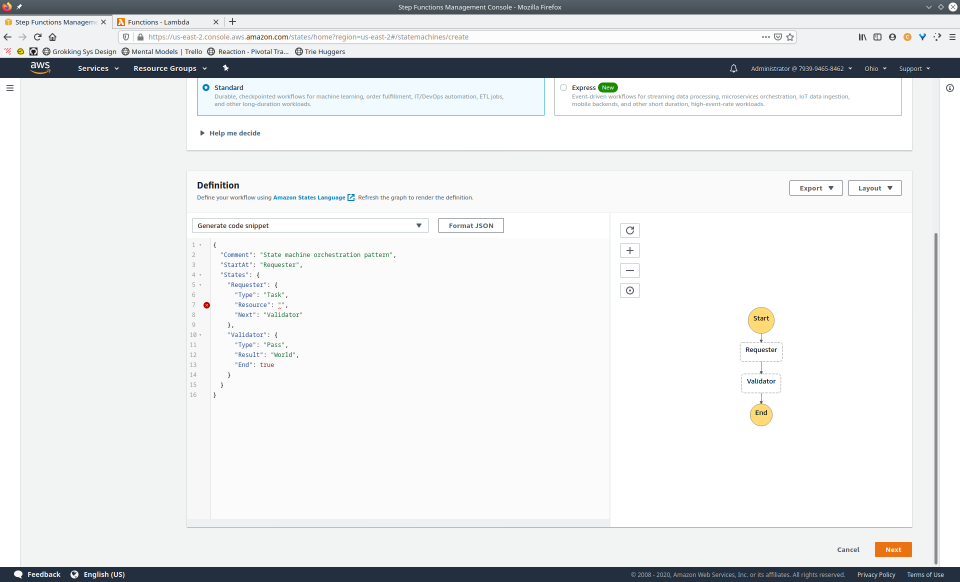
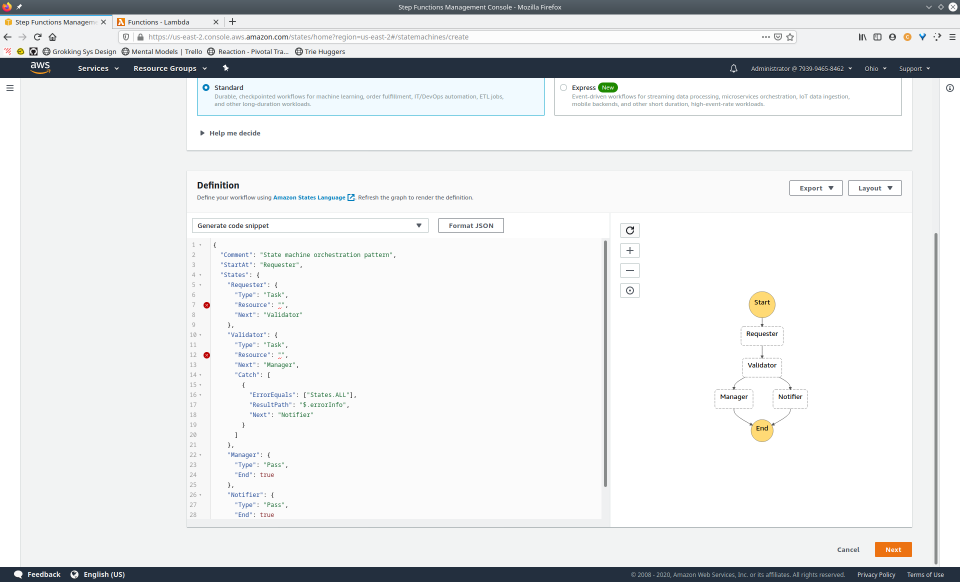
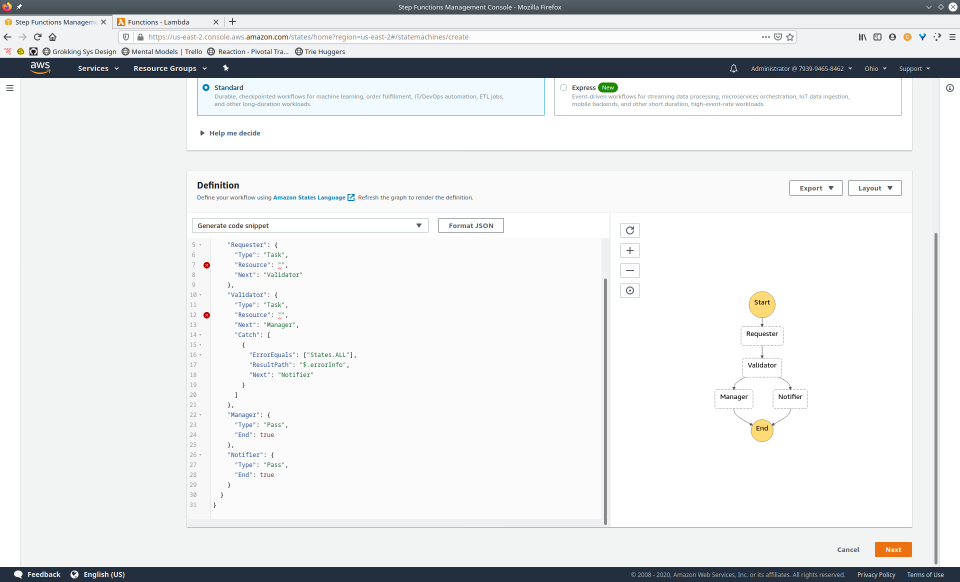
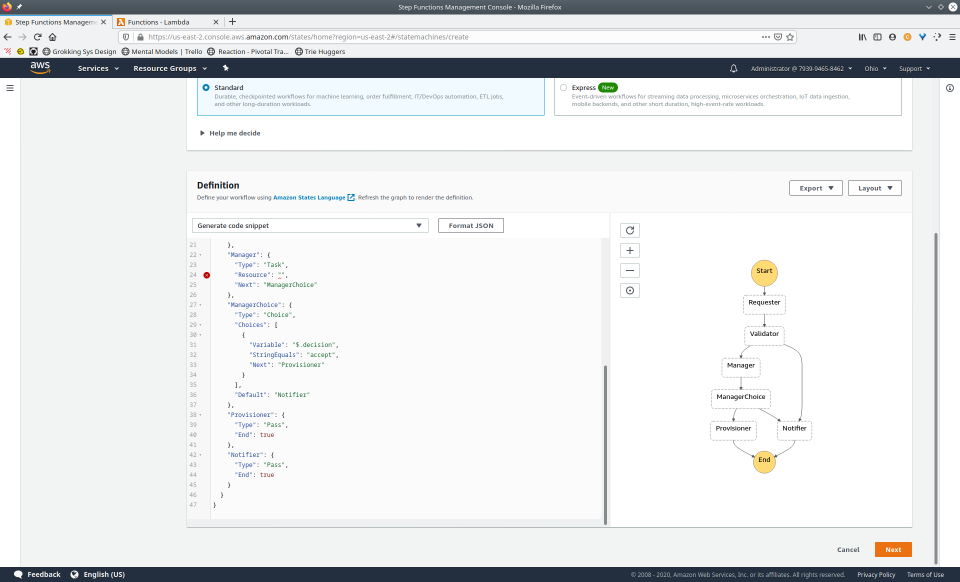
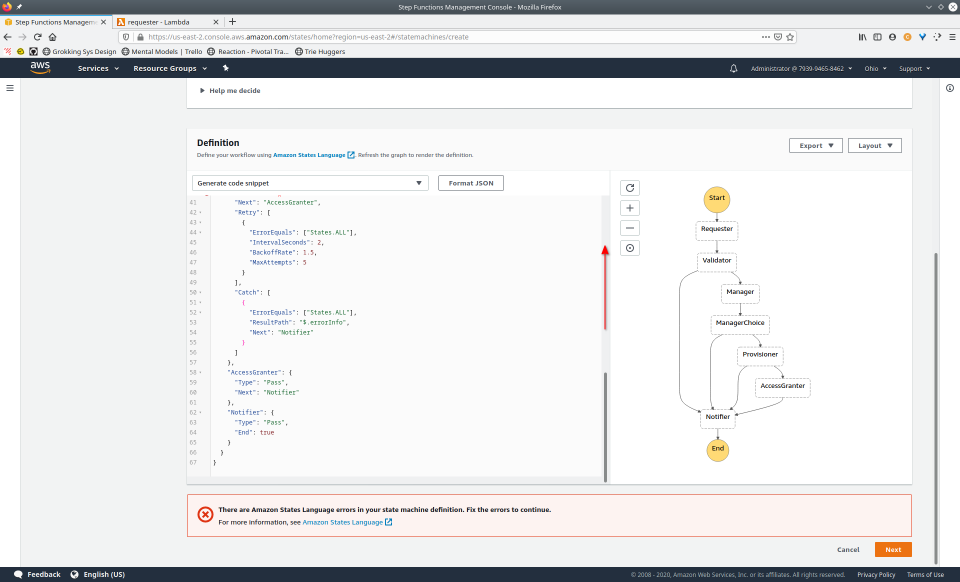
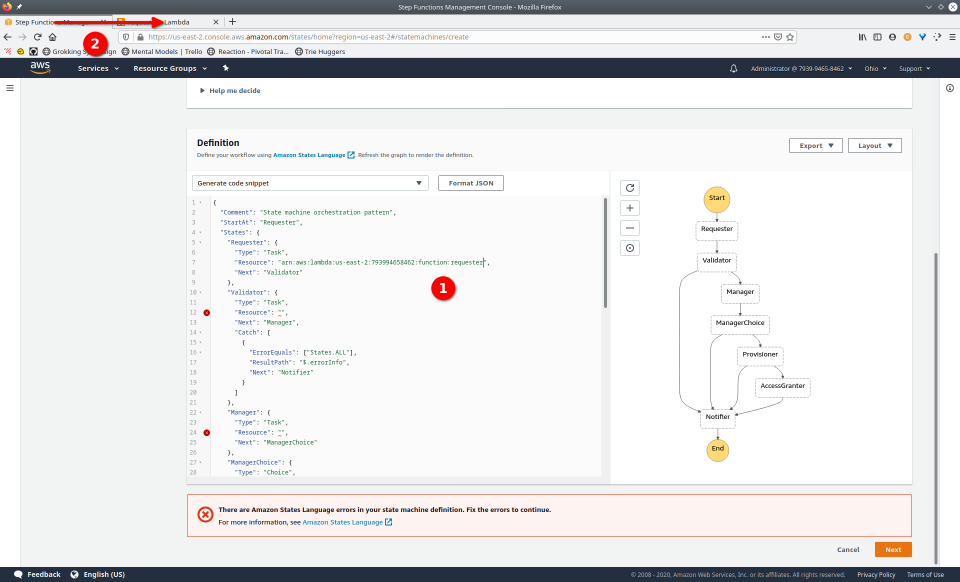
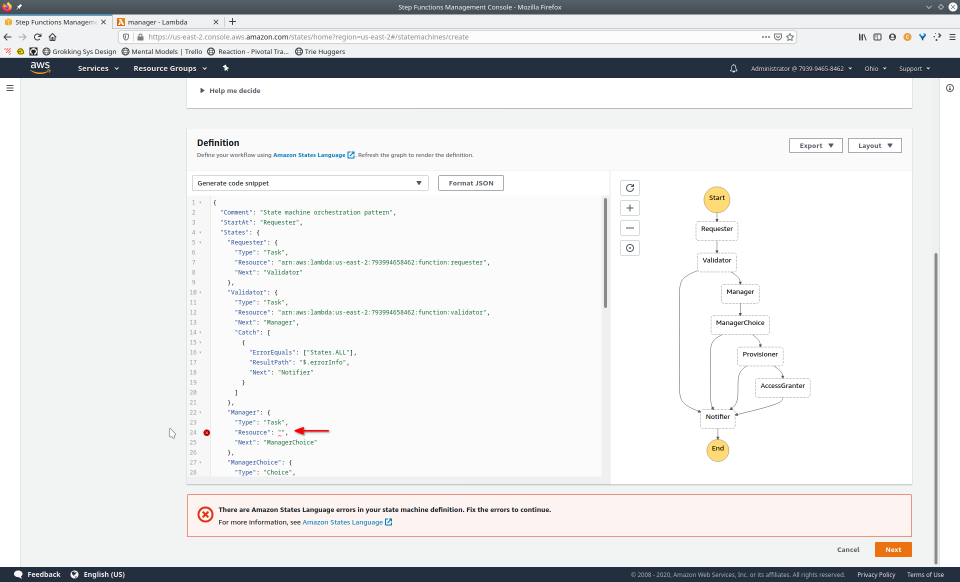
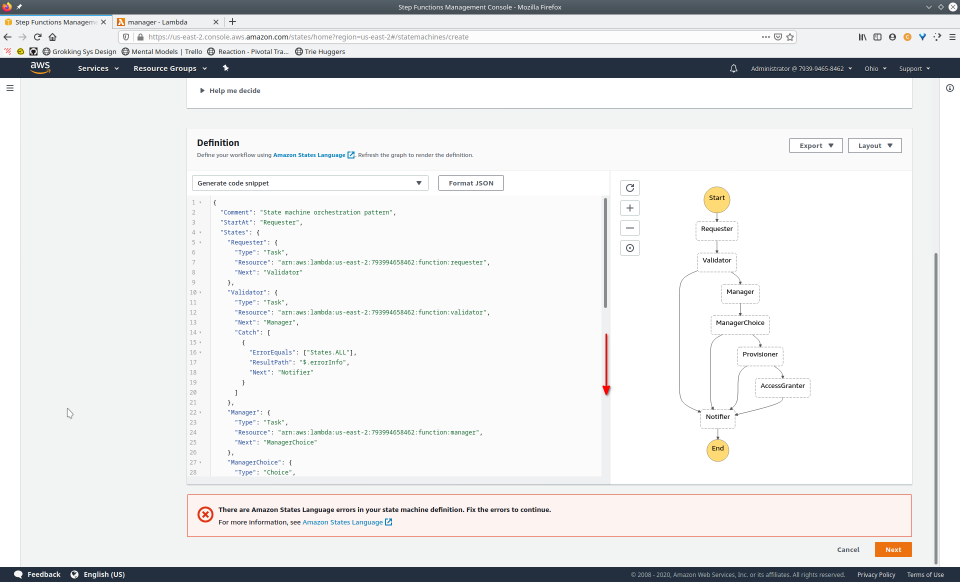
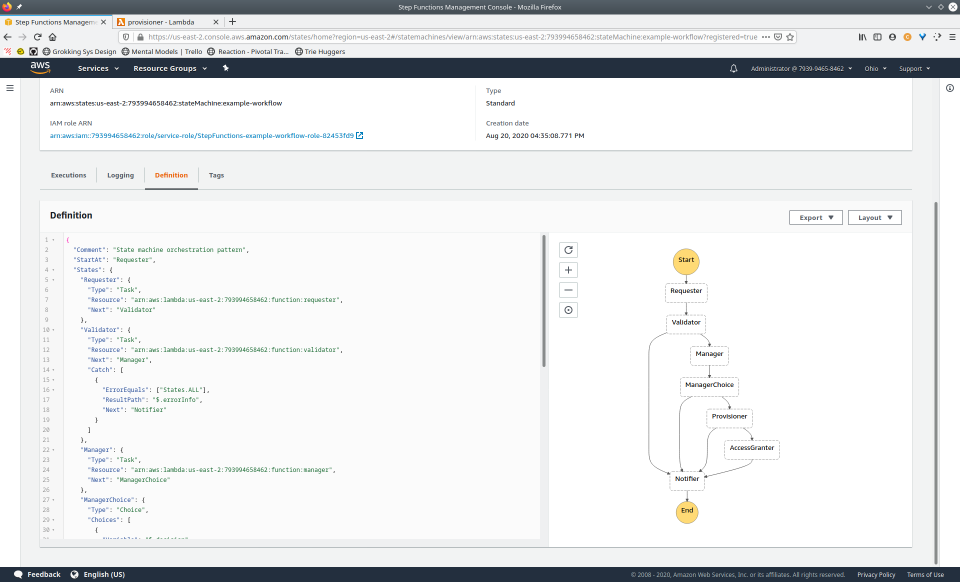
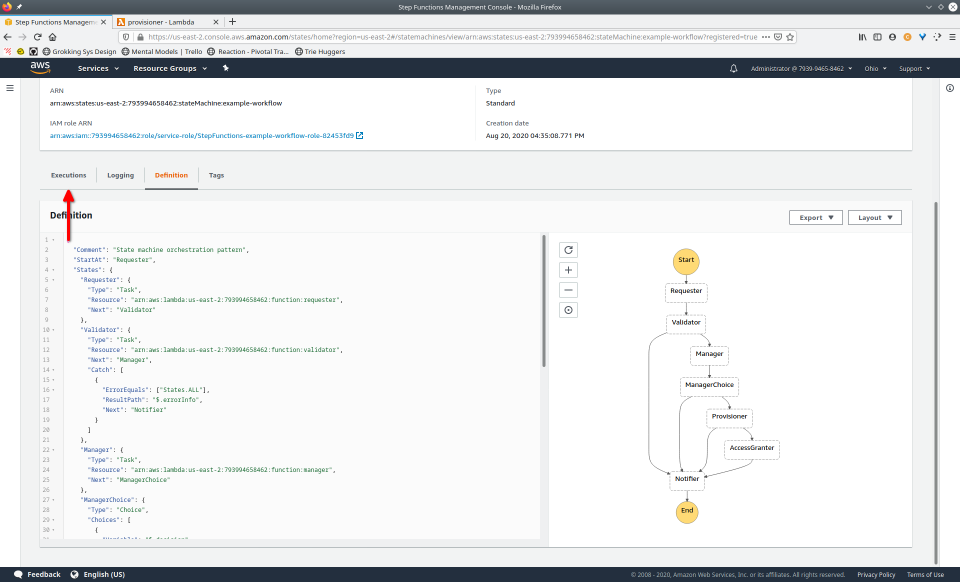
Let’s return to our earlier example of an employee requesting approval for a resource to be provisioned. We’ll now implement this workflow with Step Functions.
{
"StartAt": "Requester",
"States": {
"Requester": {
"Type": "Task",
"Resource": "arn:aws:lambda:REGION:ACCOUNT_ID:function:WORKFLOW_NAME_requester",
"Next": "Manager"
},
"Manager": {
"Type": "Task",
"Resource": "arn:aws:lambda:REGION:ACCOUNT_ID:function:WORKFLOW_NAME_manager",
"Next": "ManagerChoice"
},
"ManagerChoice": {
"Type": "Choice",
"Choices": [
{
"Variable": "$.decision",
"StringEquals": "accept",
"Next": "Provisioner"
},
{
"Variable": "$.decision",
"StringEquals": "deny",
"Next": "Notifier"
}
]
},
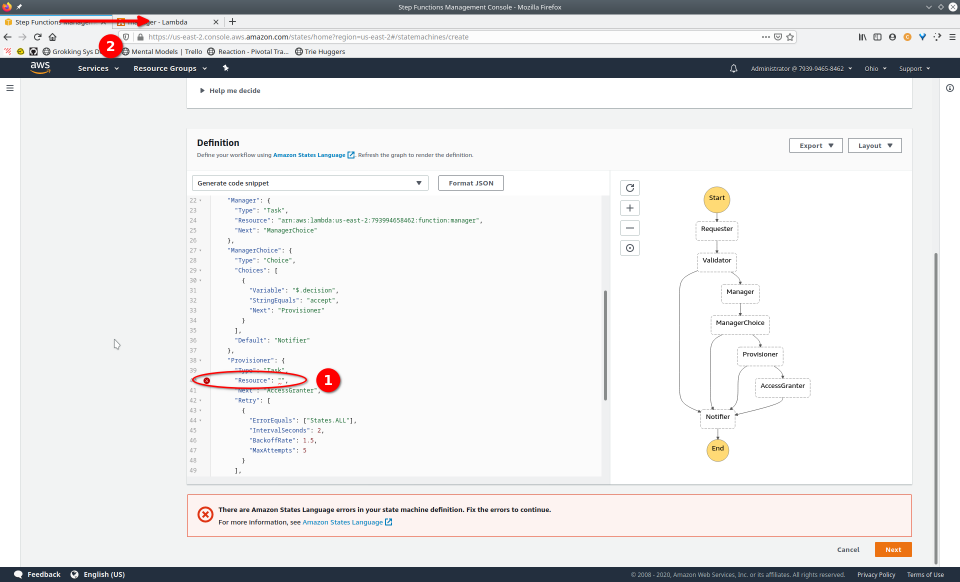
"Provisioner": {
"Type": "Task",
"Resource": "arn:aws:lambda:REGION:ACCOUNT_ID:function:WORKFLOW_NAME_provisioner",
"Next": "AccessGranter",
"Retry": [
{
"ErrorEquals": ["States.ALL"],
"IntervalSeconds": 2,
"BackoffRate": 1.5,
"MaxAttempts": 5
}
],
"Catch": [
{
"ErrorEquals": ["States.ALL"],
"ResultPath": "$.errorInfo",
"Next": "Notifier"
}
]
},
"AccessGranter": {
"Type": "Pass",
"Next": "Notifier"
},
"Notifier": {
"Type": "Pass",
"End": true
}
}
}
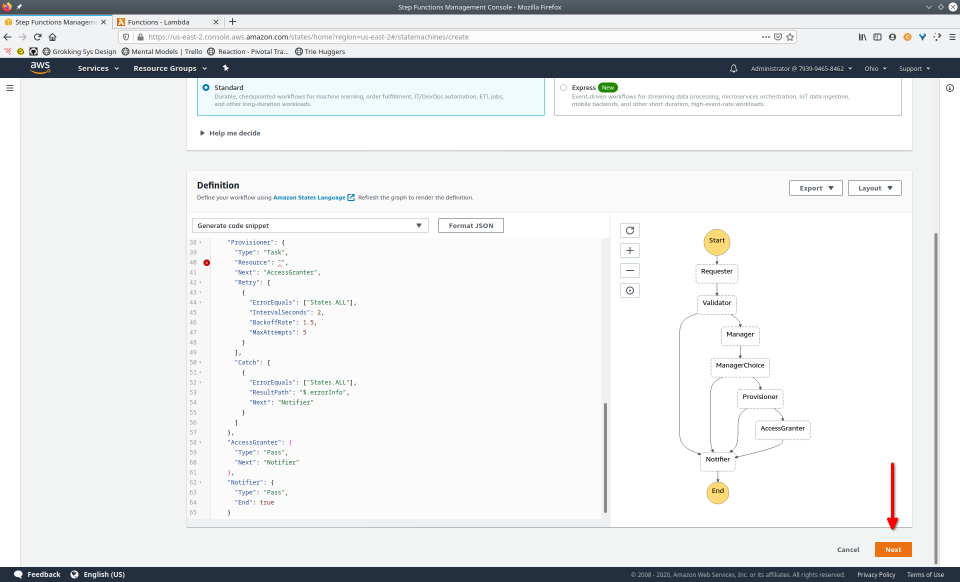
One of the states, Provisioner, is mapped to the Lambda
that handles resource provisioning. Looking more closely at this
state, we see how one might implement retry logic.
Task states have an optional field called
Retry that will specify which types of errors to retry,
how many seconds to wait in between, as well as a backoff rate and a
maximum number of attempts. It’s useful to be able to put this
orchestration concern here, instead of writing some custom retry logic
alongside business logic.
//…
"Provisioner": {
  "Type": "Task",
  "Resource": "arn:aws:lambda:REGION:ACCOUNT_ID:function:provisioner",
  "Next": "AccessGranter",
  "Retry": [
    {
      "ErrorEquals": ["States.ALL"],
      "IntervalSeconds": 2,
      "BackoffRate": 1.5,
      "MaxAttempts": 5
    }
  ],
  //…
},
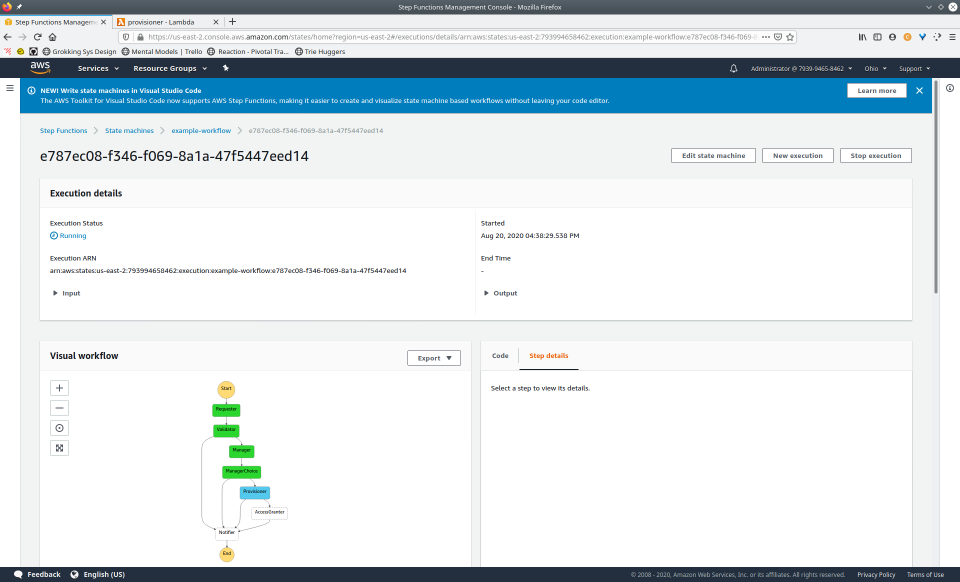
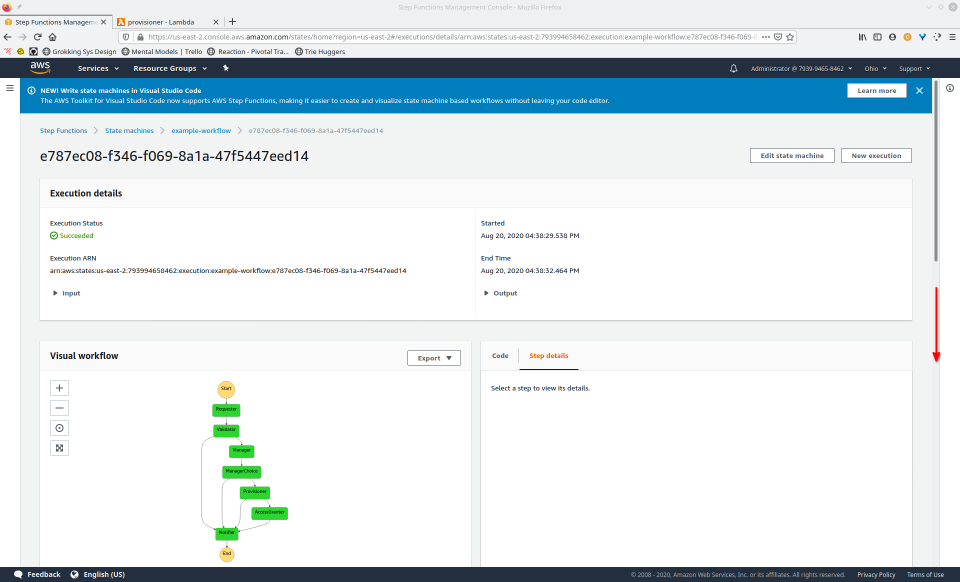
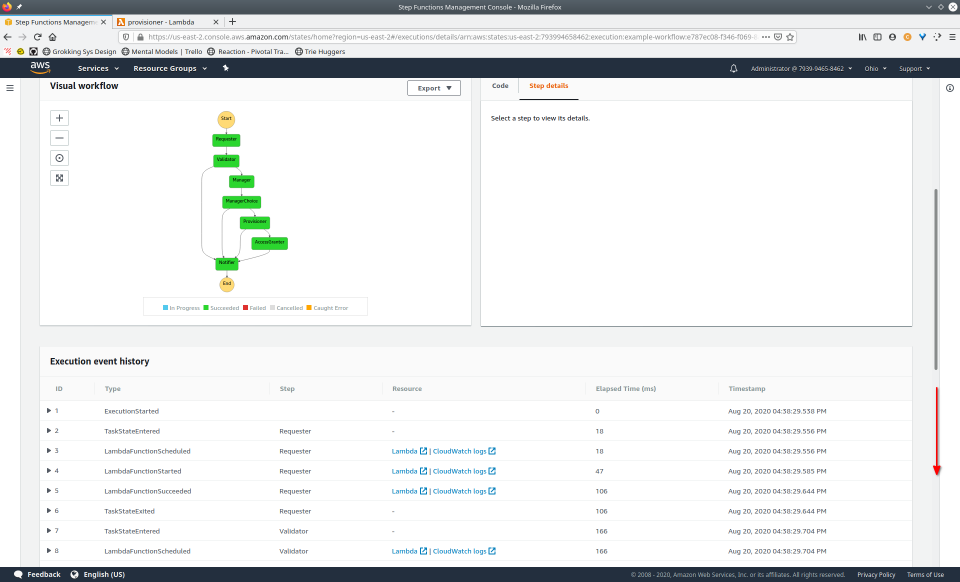
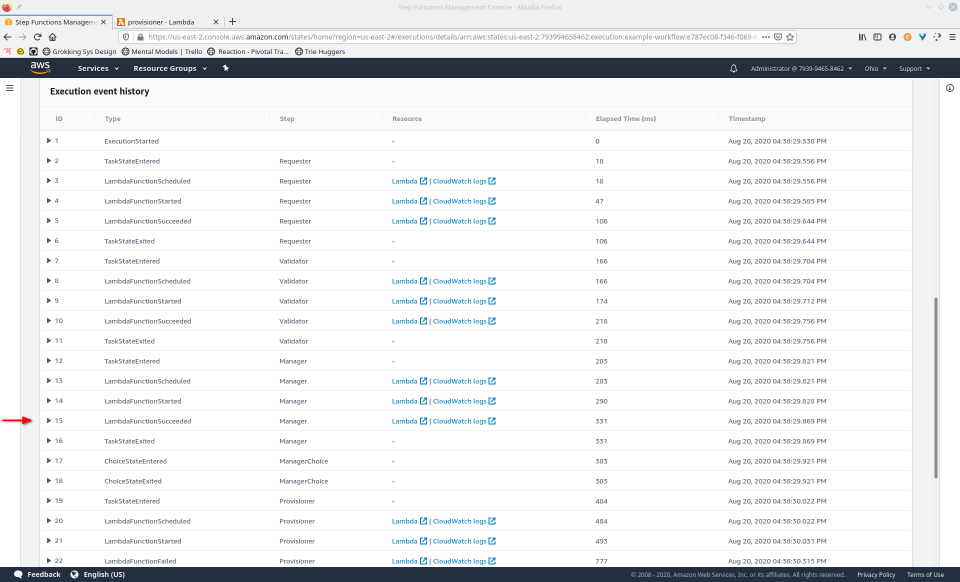
4.2 Execution Event History
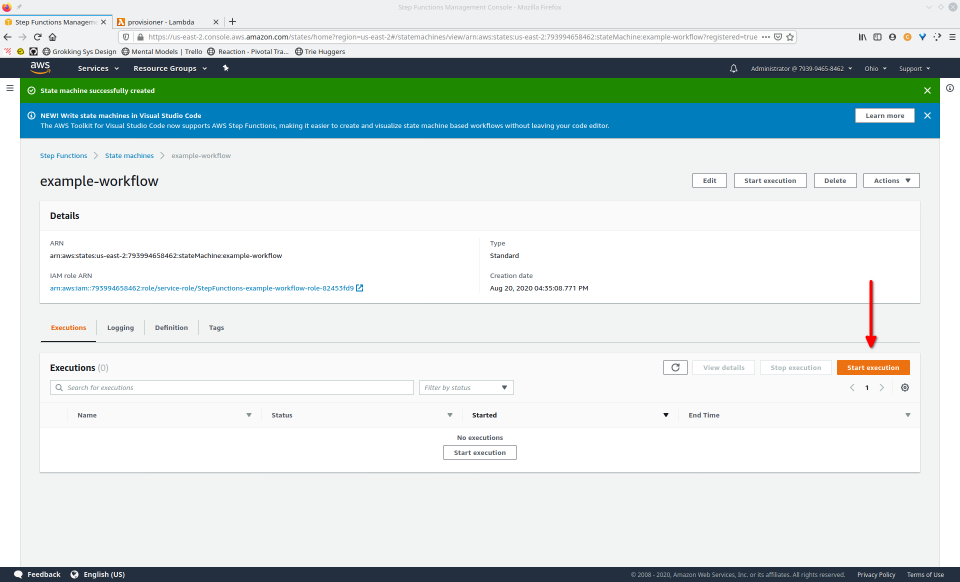
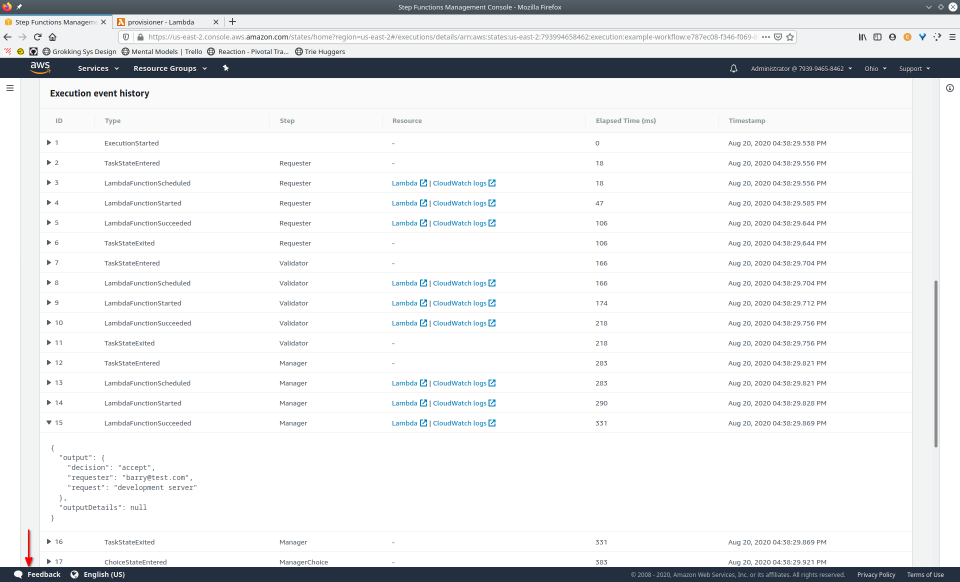
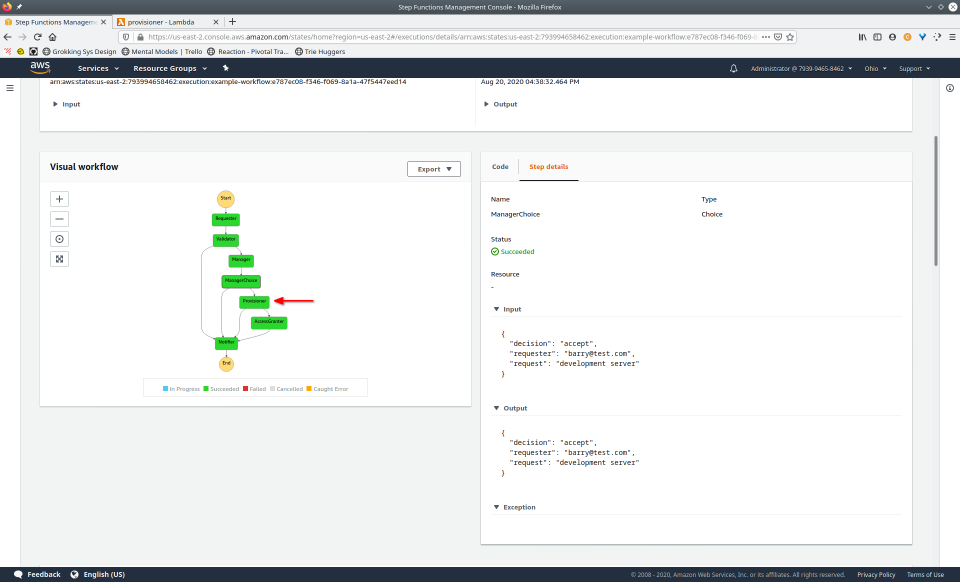
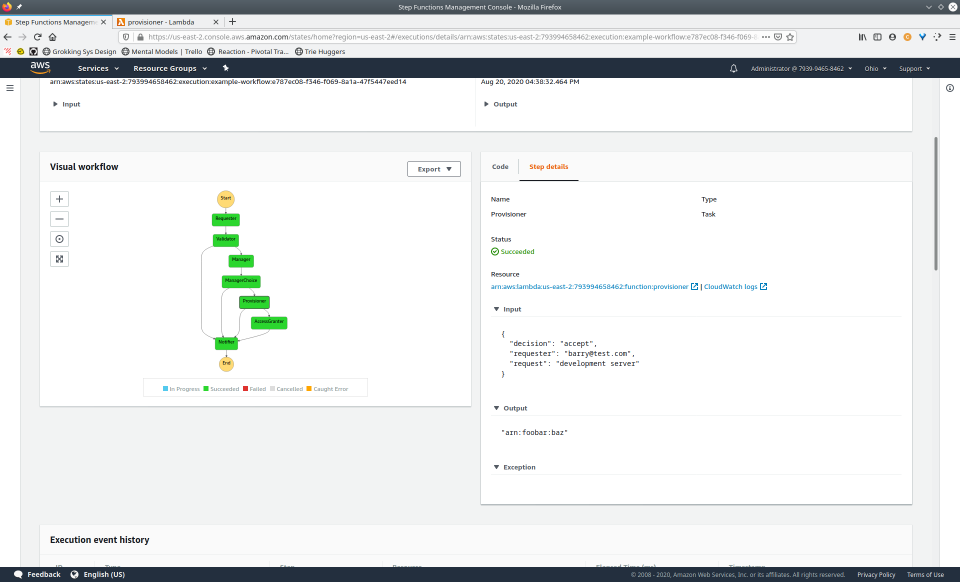
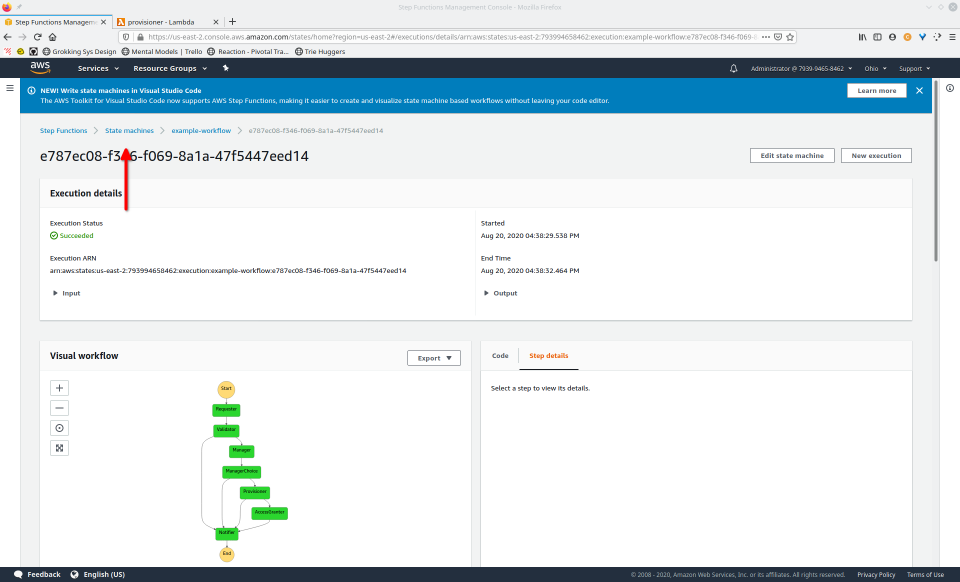
Once a state machine has executed, using the AWS Management Console, we’re able to access an interactive execution event history. This allows us to audit the transitions between states in one, unified place.
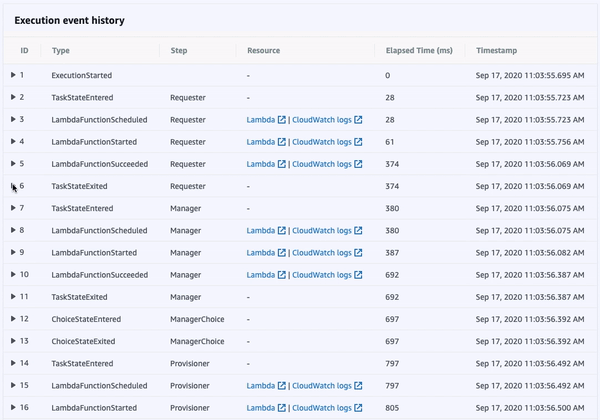
Additionally, the visual workflow will be color-coded to help us quickly remember the outcome of each state for that execution. This interface is updated in real-time, which can be helpful when viewing the status of longer-running state machines.
The core purpose of AWS Step Functions is to provide an orchestration layer, preventing us from having to somehow choreograph our application’s resources. Step Functions also provides many built-in features, such as eight state types, unified logs, and visual workflows that can help when needing to audit executions.
Despite these benefits, some challenges arise when choosing to develop with Step Functions. Let’s examine some of these problems.
5. Problems
5.1 Programming Model
One of the common complaints with Step Functions is that ASL is not very intuitive.
Amazon States Language is quite complex; its syntax is based on JSON and therefore optimized for machine readability instead of readability by humans.
Imagine creating a state machine with dozens or even hundreds of states.
“ ‘… Nobody wants to write JSON format for a state machine that has hundreds of states.’ -Interviewee 1
There is an expectation that, in the future, higher-level abstractions will be developed and current technologies, such as Lambda and Step Functions, will become mere deployment platforms, which are not intended to be programmed directly.”
Several tools attempt to provide higher-level abstractions that compile down to ASL. However, none has been widely adopted and there is still unsettled debate regarding the characteristics of these tools [7].
It seems that, for now, the most effective way to alleviate the pain of working with ASL is to use templates. This at least provides a useful starting point for developers new to Step Functions and is a nice convenience for those who are more familiar with ASL.
5.2 Deployment
The AWS Management Console’s tagline is “Everything you need to access and manage the AWS cloud — in one web interface.” [8]

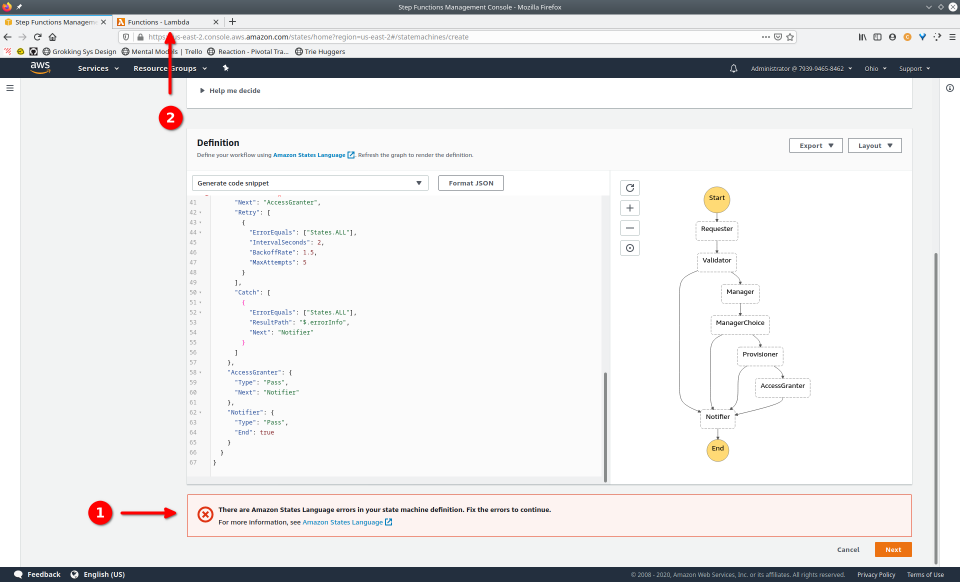
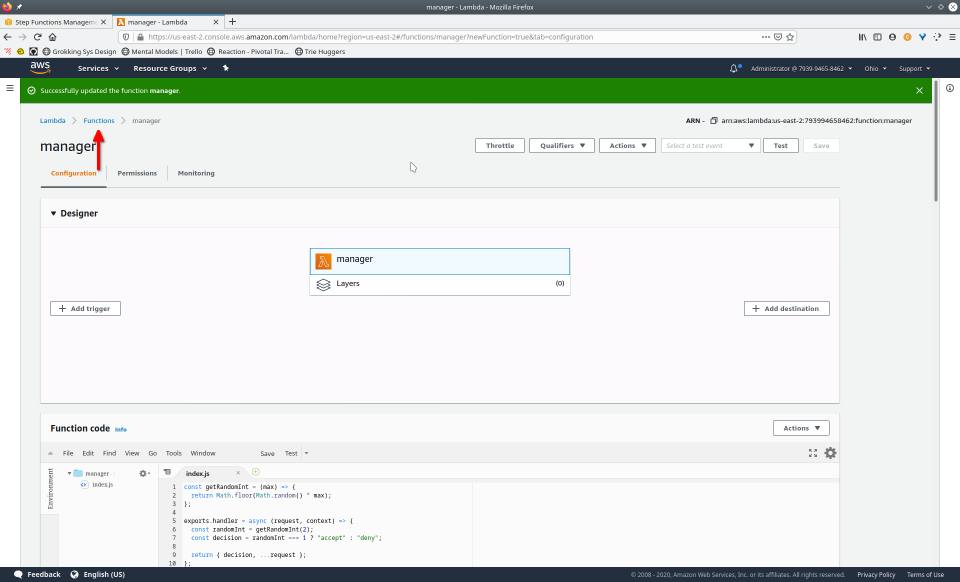
Let’s look at the steps involved to deploy our example workflow using only the AWS Management Console.
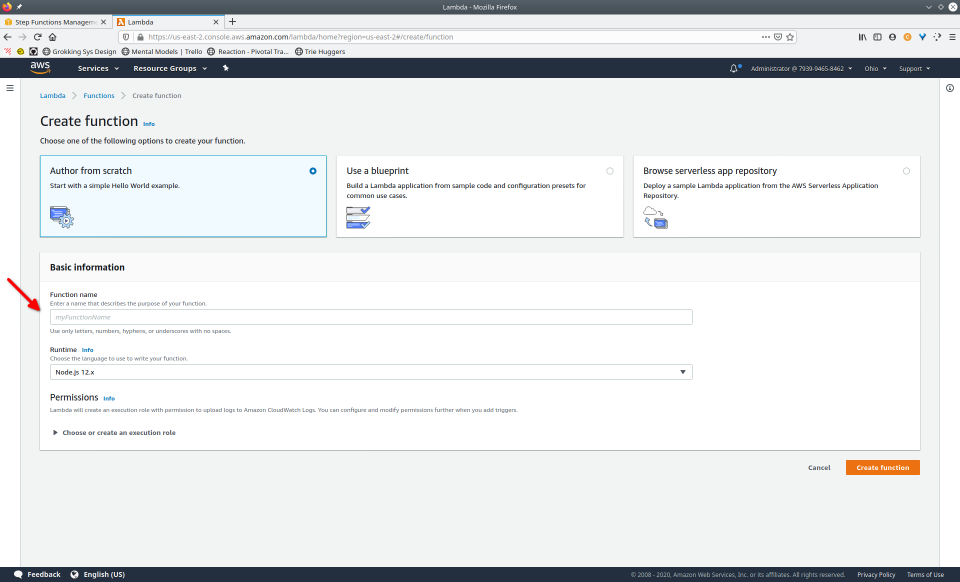
The Management Console indeed provides everything needed for managing the AWS cloud. But it also requires extensive configuration and navigation – pointing, clicking, reloading of the screen, often in a rigid order. The three Lambdas in our workflow all have to go through the same tedious process. Imagine if our example had included ten or more Lambdas.
Although the Management Console touts itself as “one web interface”, each of the AWS services has a different flavor of that interface with distinct concepts and interactions. Each service must be configured with the correct region and account number and must be assigned security roles with the proper execution permissions. Also, an account that contains multiple applications will list all services of the same kind alongside one another, mingling the resources of separate applications together.

What would it look like if we decided to tear down our state machine and its associated Lambdas? It would be a similar, error-prone process but in reverse order. This is not conducive to quickly developing a new workflow that requires frequent iteration.
The manual tedium of deploying to the AWS cloud using only the Management Console is a process that should be automated. Fortunately, several serverless deployment frameworks aim to do just that.
6. Existing Solutions
A framework for deploying to AWS will typically be built using one of two AWS tools. Let’s first understand a bit about these tools before examining any specific frameworks.
The first one we’ll look at is called AWS CloudFormation [9]. With this approach, a framework can guide us through a process of creating framework-specific files that are then compiled to a single CloudFormation config file. All our serverless resources can then be deployed using this file. Frameworks that aim to be more general-purpose often take the CloudFormation approach.

The other tool is the AWS Software Development Kit (SDK) [10]. This is a collection of APIs that allow us to work directly with individual resources from our language of choice. Frameworks geared toward a specific use case or a particular language are usually built with the SDK.

Let’s now examine some specific frameworks, keeping in mind that we’ll only be considering those that support Step Functions.
6.1 Serverless Framework
The aptly named Serverless Framework [11] is the dominant player in this space. It supports deployment to many cloud providers and in several different languages.

Serverless Framework has an active community that has created over two thousand open-source plugins [12]. One of these plugins enables support for Step Functions.
There are some common state machine templates available at the bottom
of the plugin’s README [13]. While this is helpful, it would be nice to be able to create a new
project based on a certain template without having to copy and paste
from the README. Also, to accommodate Serverless
Framework’s conventions, the state machine must be written in YAML.
This is unfortunate since ASL is a JSON-based language.
6.2 AWS SAM
Amazon provides a framework for serverless deployment called the AWS Serverless Application Model (SAM) [14]. SAM started providing support for Step Functions just a few months before this writing [15].

Unlike Serverless Framework, SAM can deploy a working state machine from a template, without having to make any manual configurations – it can all be done straight from the CLI. However, there is only one template that is offered and it has a relatively lengthy deployment time, taking about three minutes. There are also several prompts that the user must respond to during this process. Once deployed, there doesn’t seem to be a command that just as easily tears down, so that must be done manually.
It’s important to note that neither Serverless Framework nor SAM was designed with Step Functions in mind. They both later added support for Step Functions for apps that happen to use them. And because of their general-purpose nature, these frameworks carry around a lot of tooling, which may be unnecessary and bulky for simpler workflows.
6.3 Step
What about more purpose-built frameworks that use the SDK? Unfortunately, there don’t seem to be many specifically designed for Step Functions. There is one built by Coinbase called Step, which is “a framework for building, testing, and deploying AWS Step Functions and Lambda”. [16].

Step allows the user to construct a state machine definition with a higher-level language, namely Go. However, Coinbase seems to be one of the only users of their framework. Indeed, the development status of the framework is listed as Beta. An additional drawback is that Step is not able to create a new state machine but can only modify an existing one. This can be a hindrance to the developer who is wanting to quickly iterate on their work but has to manually create a mock state machine first.
While the above solutions provide some helpful ways to manage Step Functions, we found them lacking in some important areas. Because of this, we decided to build Maestro.
7. Maestro
Maestro is an open-source framework for AWS Step Functions built with ease of use in mind. It offers simple commands that facilitate common operations for applications that are suited for Step Functions, including interactions with AWS.
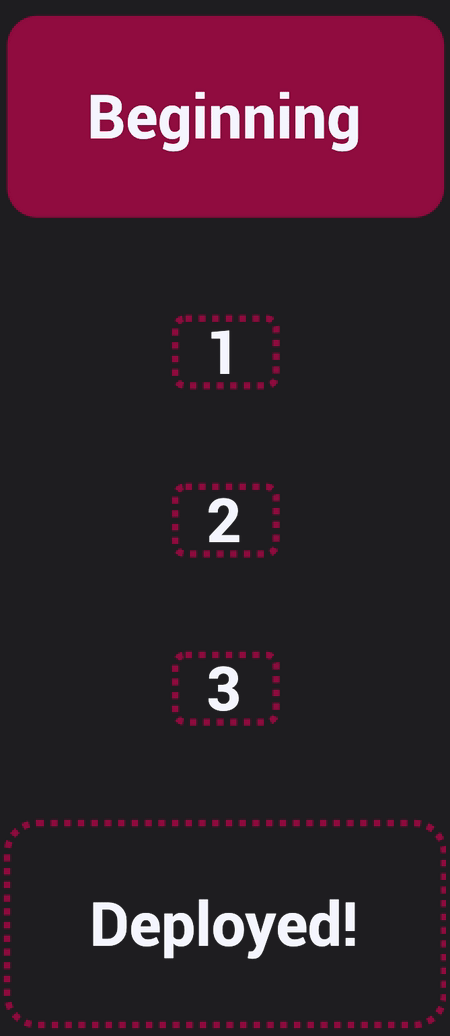
Once Maestro has been installed and configured, deploying a state machine is a simple process. Create a new Maestro project, optionally edit the state machine template, and then type one command to deploy the state machine and any Lambda functions it includes. One could say that it’s as easy as 1, 2, 3.
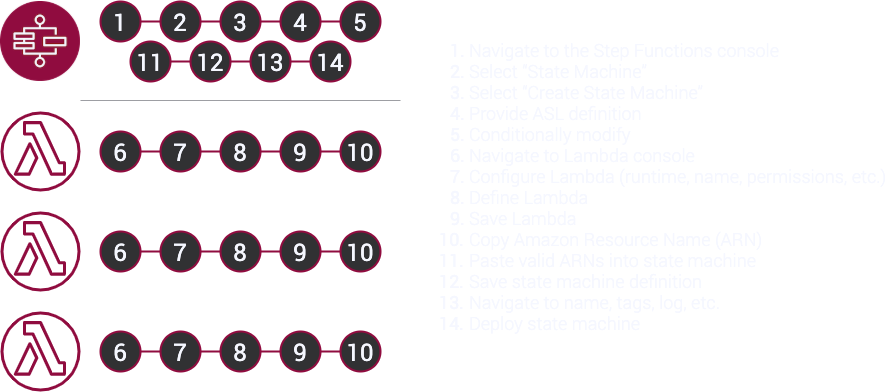
To fully demonstrate the power of Maestro, first consider this slideshow that shows in detail the steps required to deploy our example workflow using just the AWS Management Console:
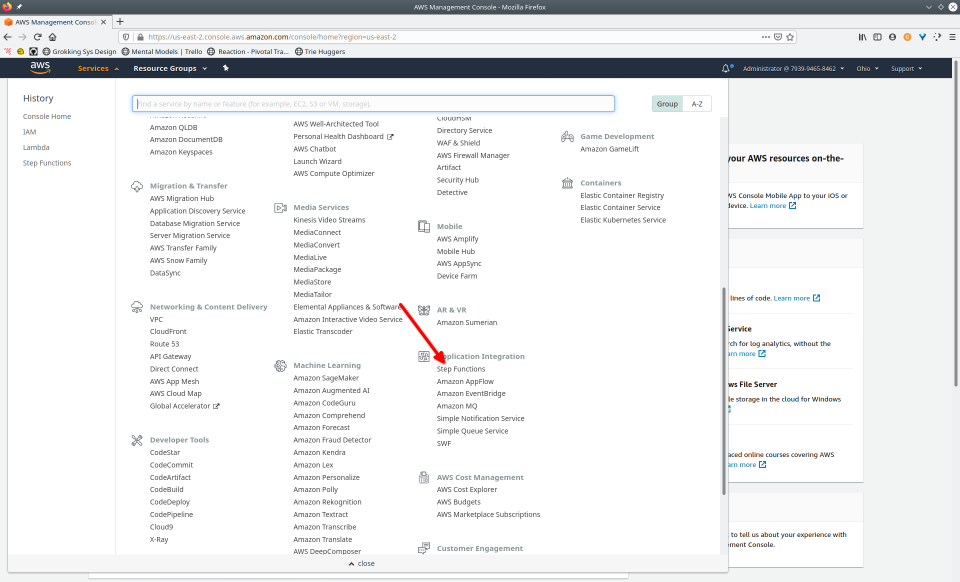
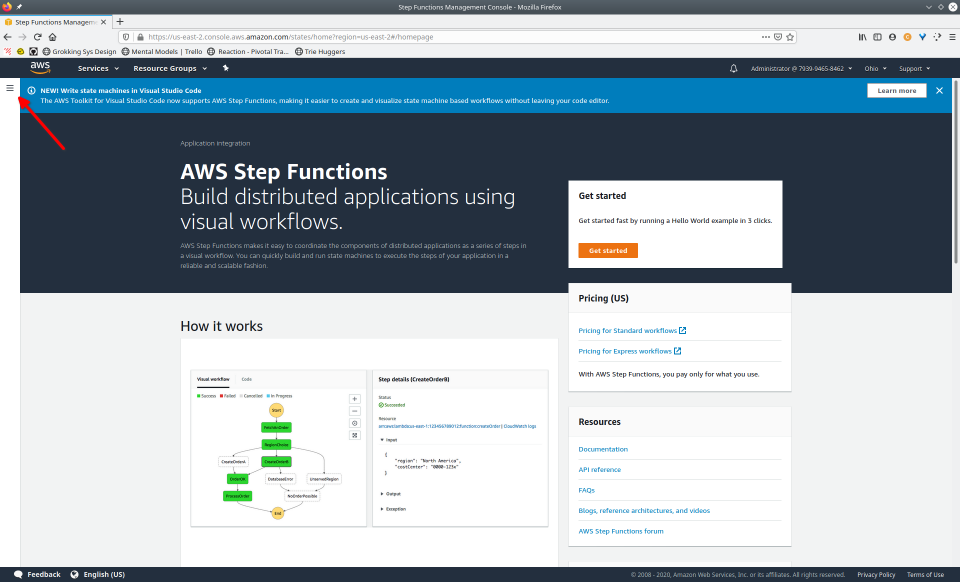
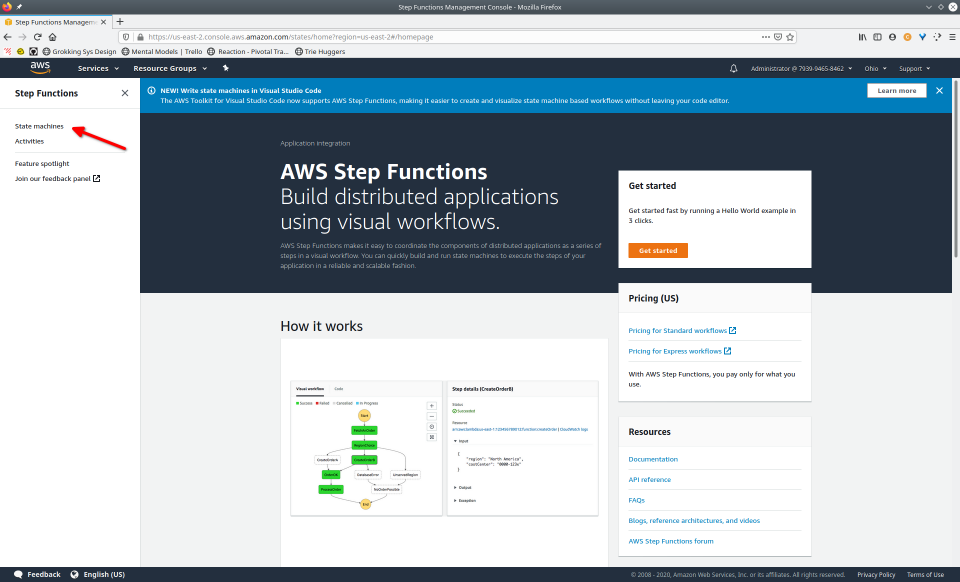
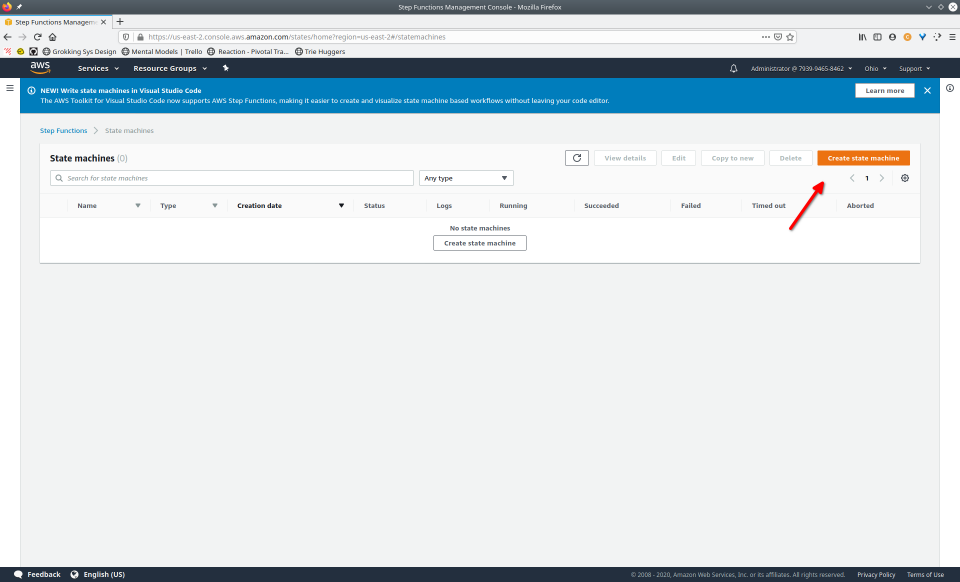
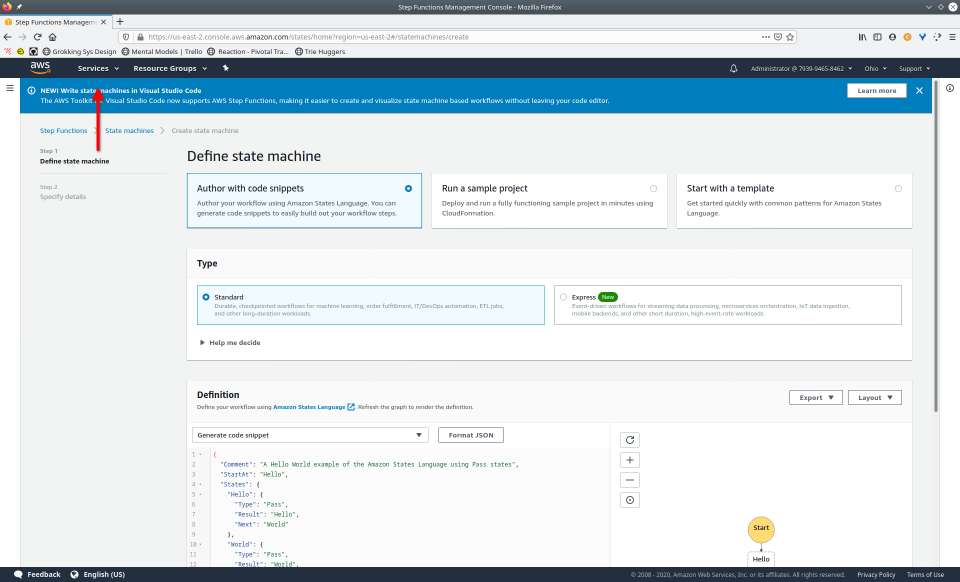
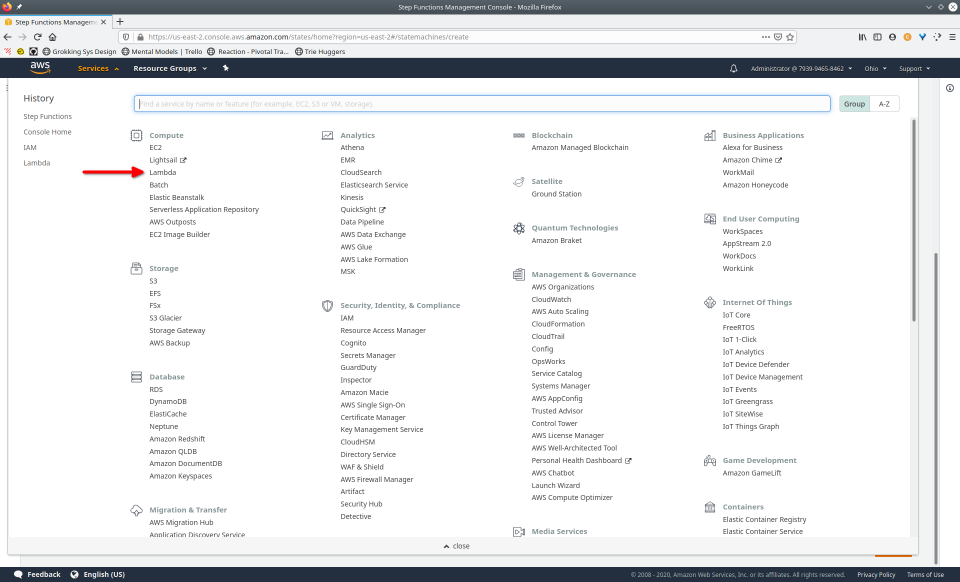
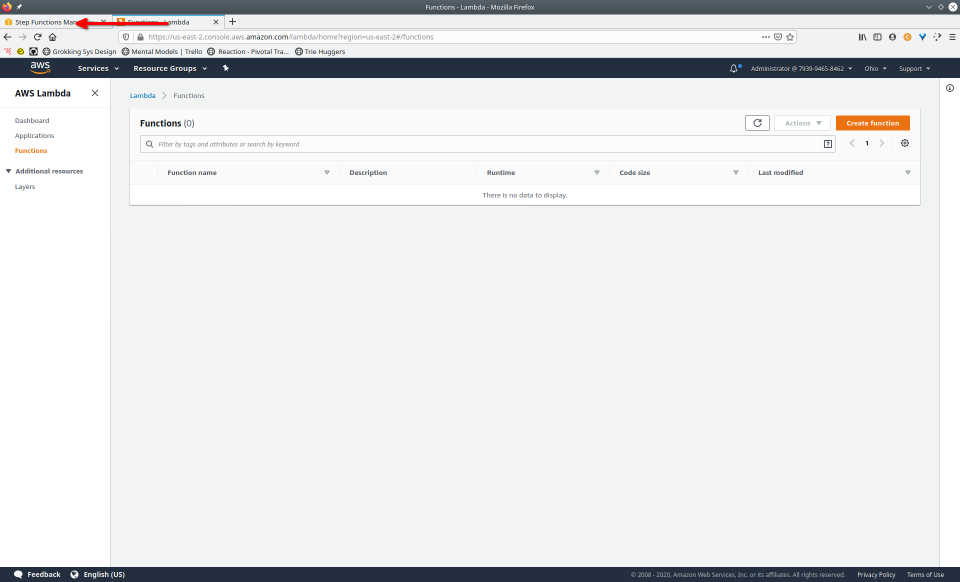
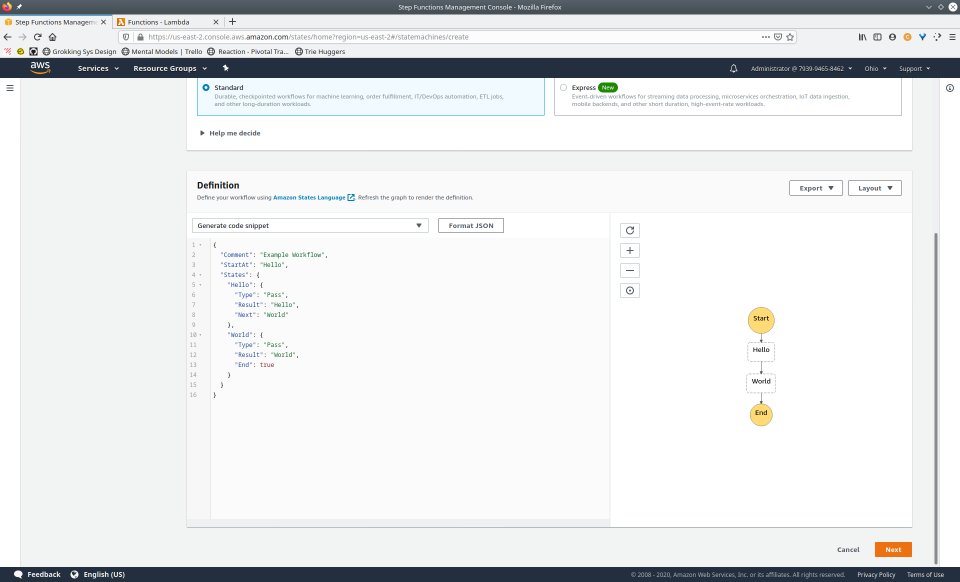

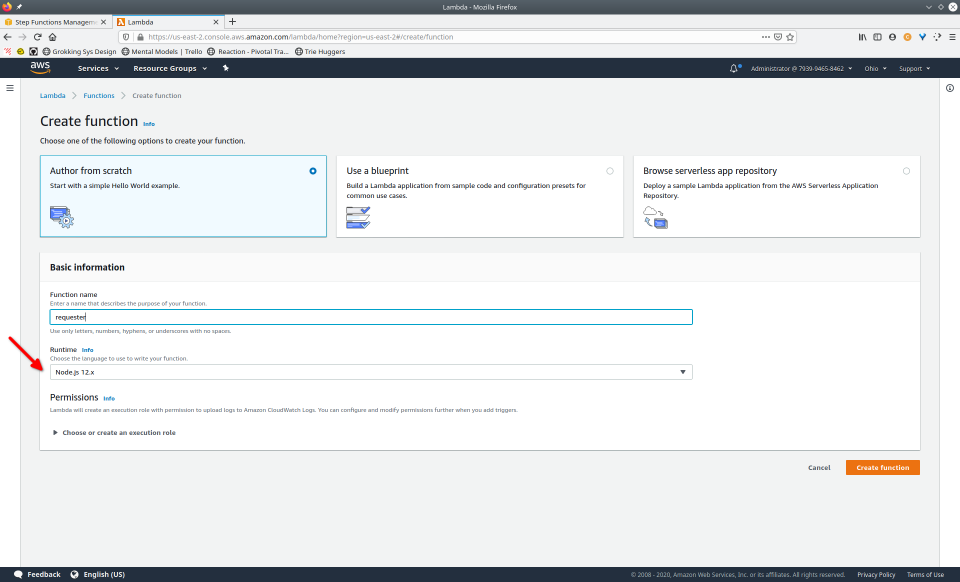
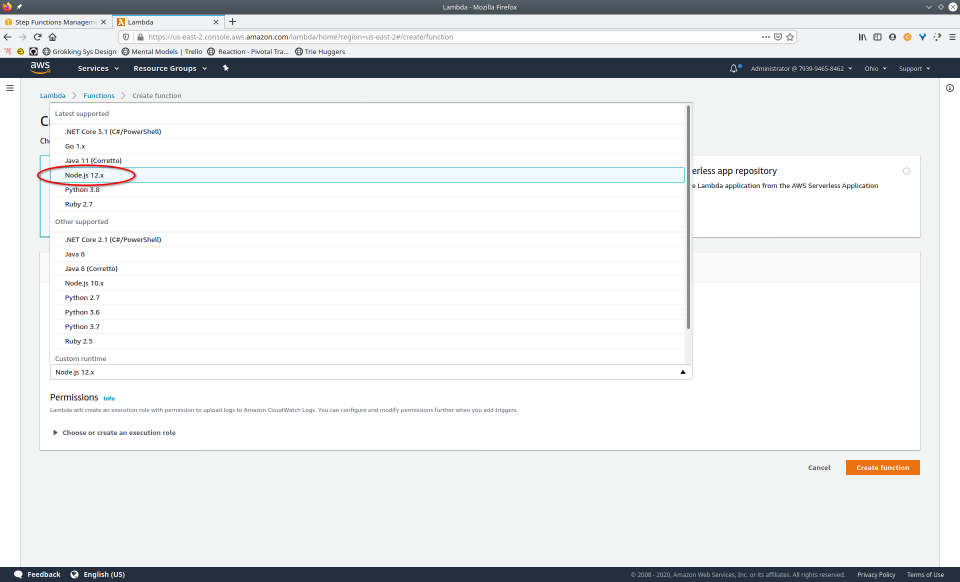
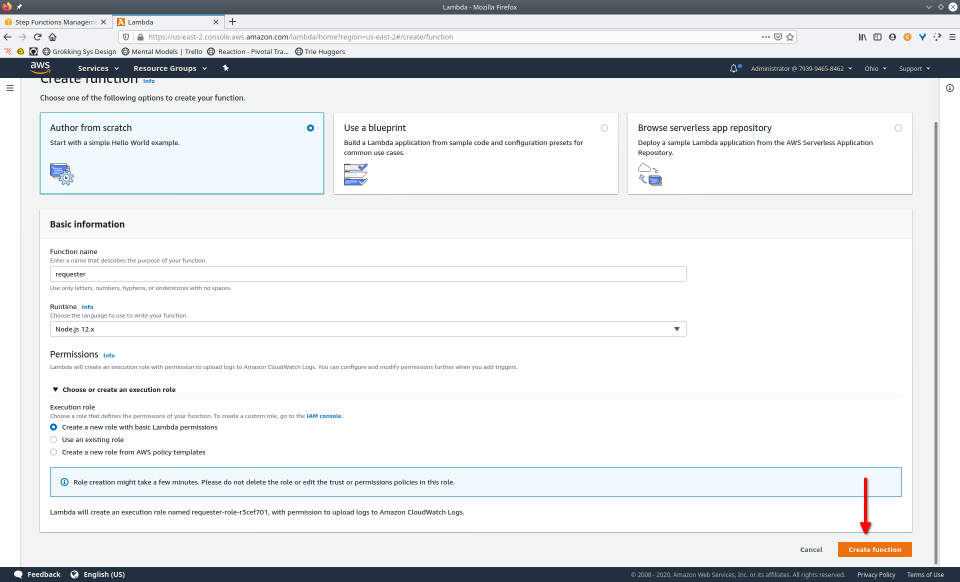
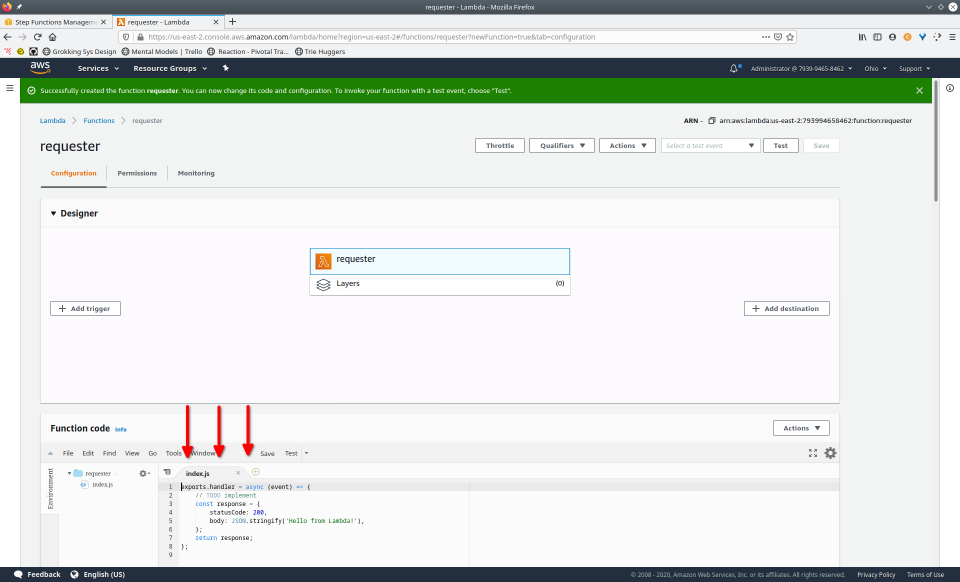
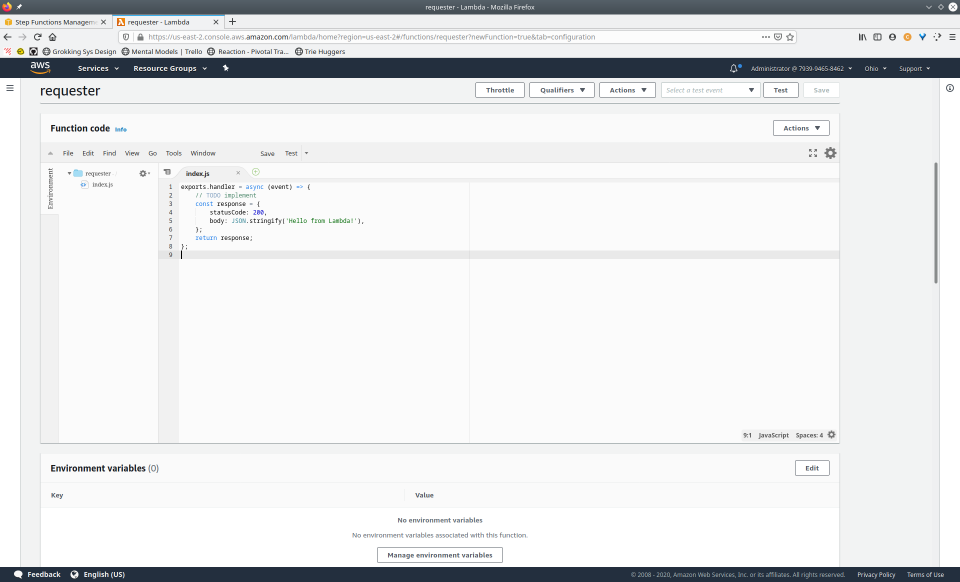
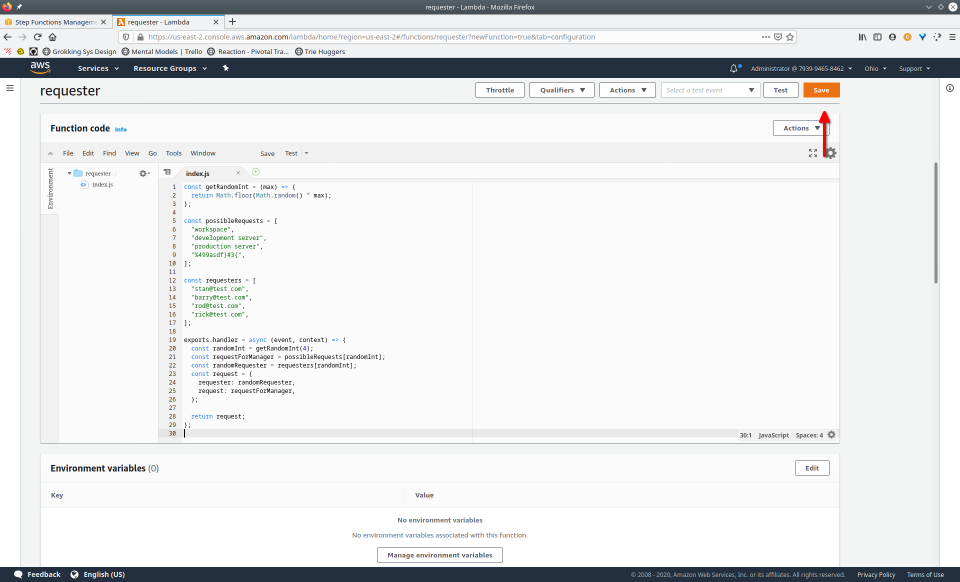
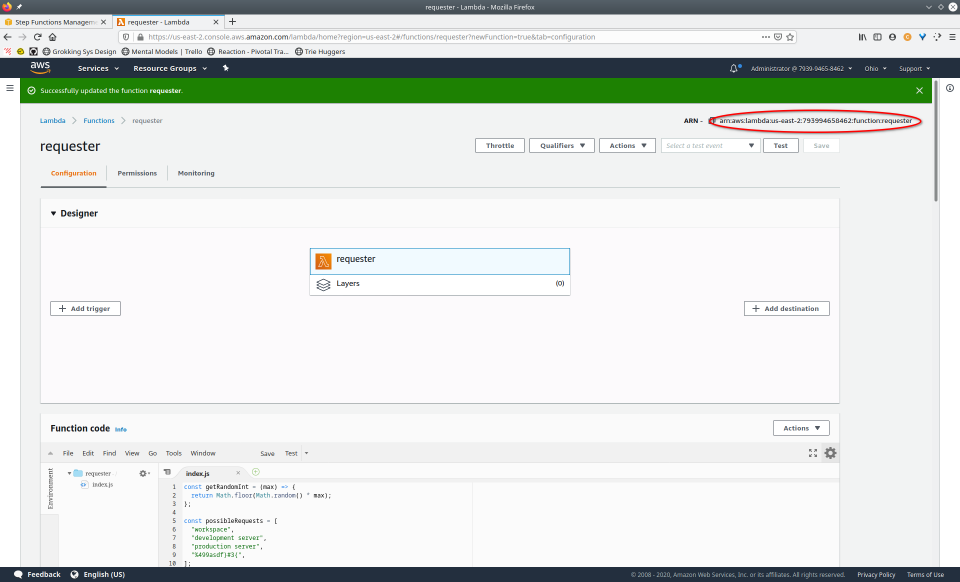
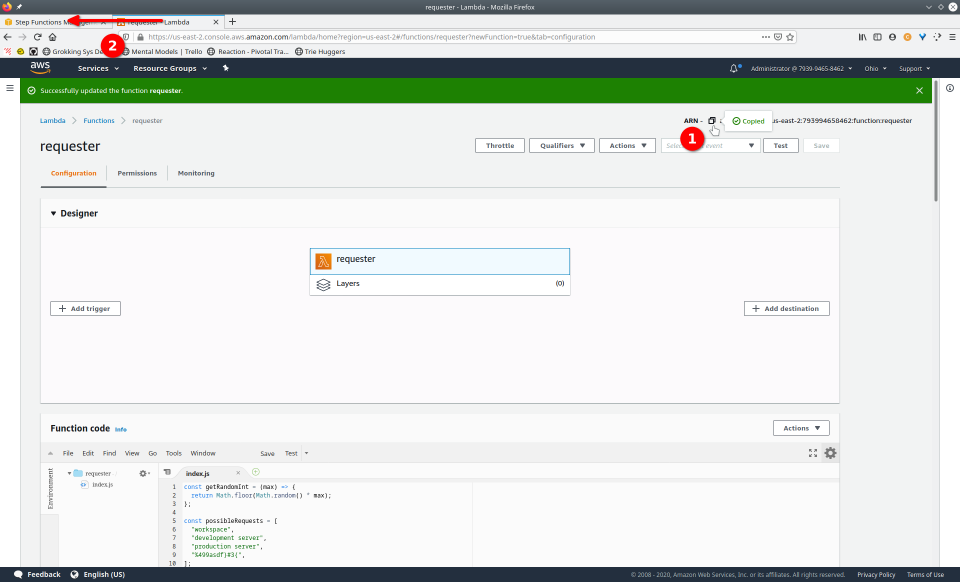
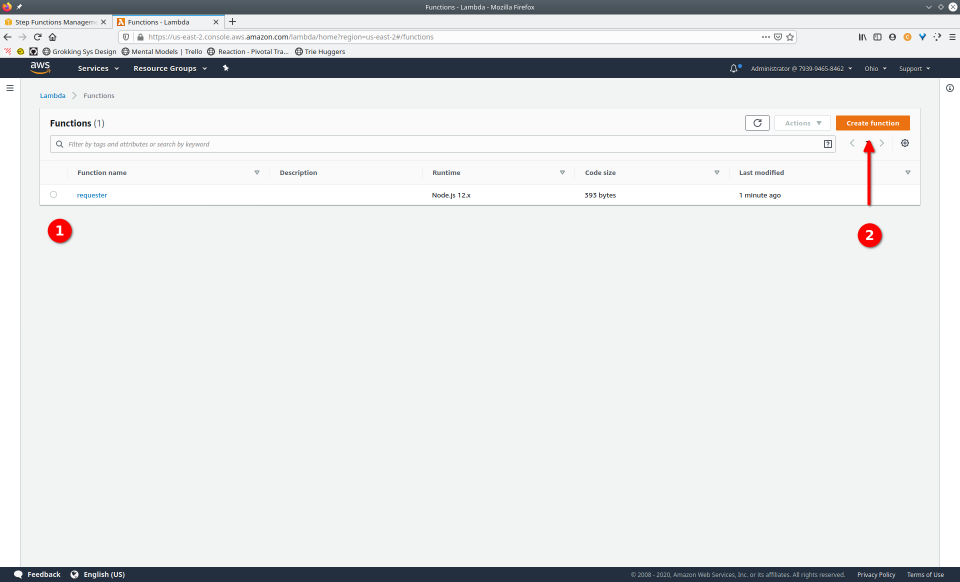
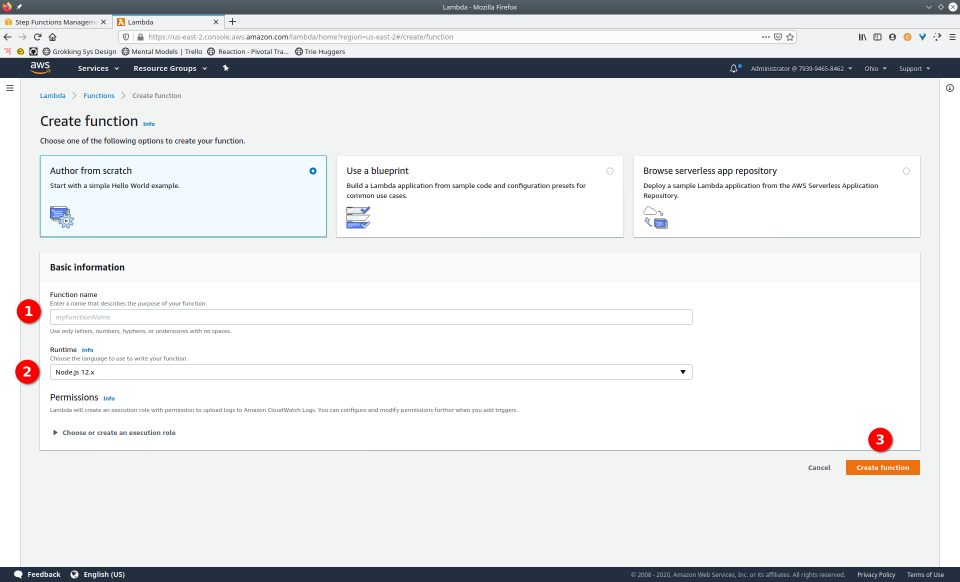
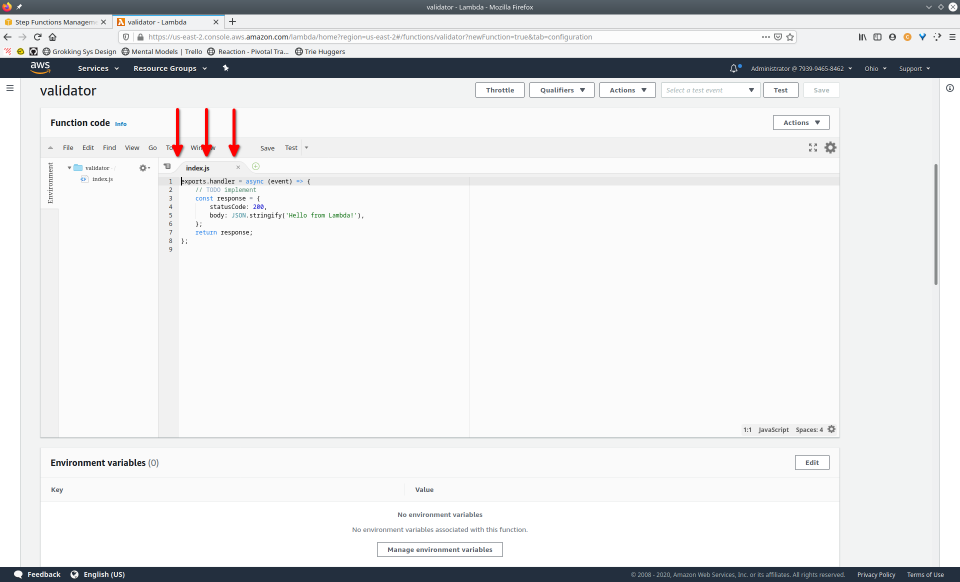
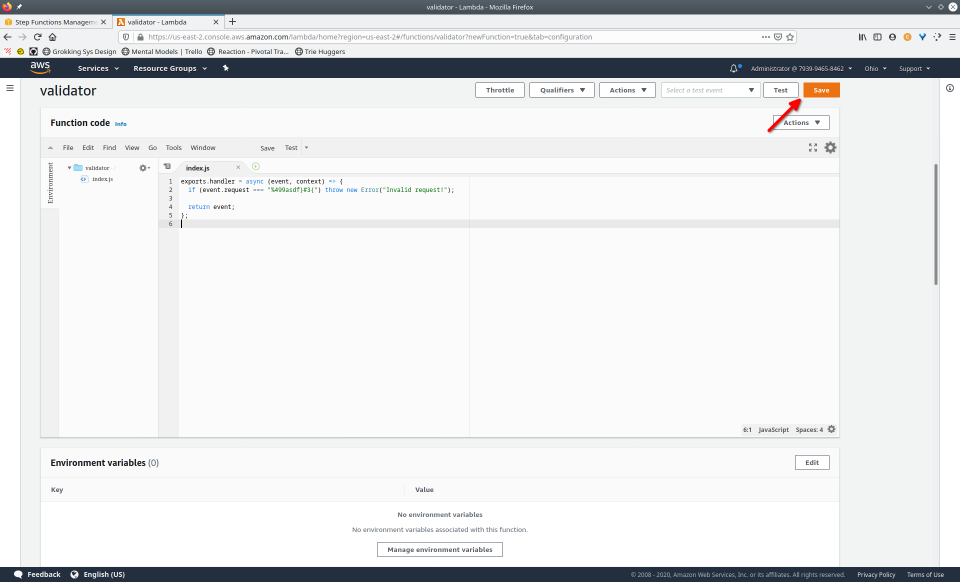
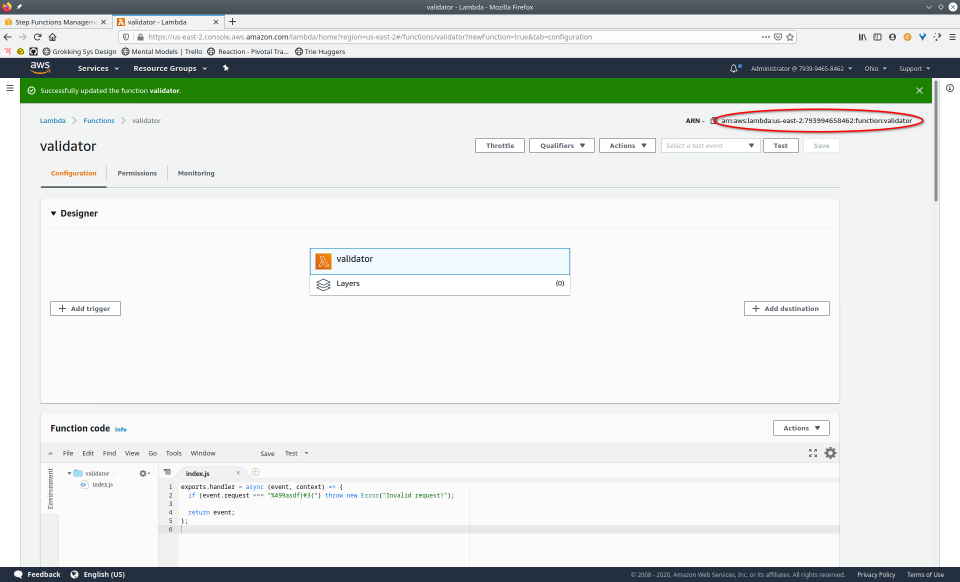
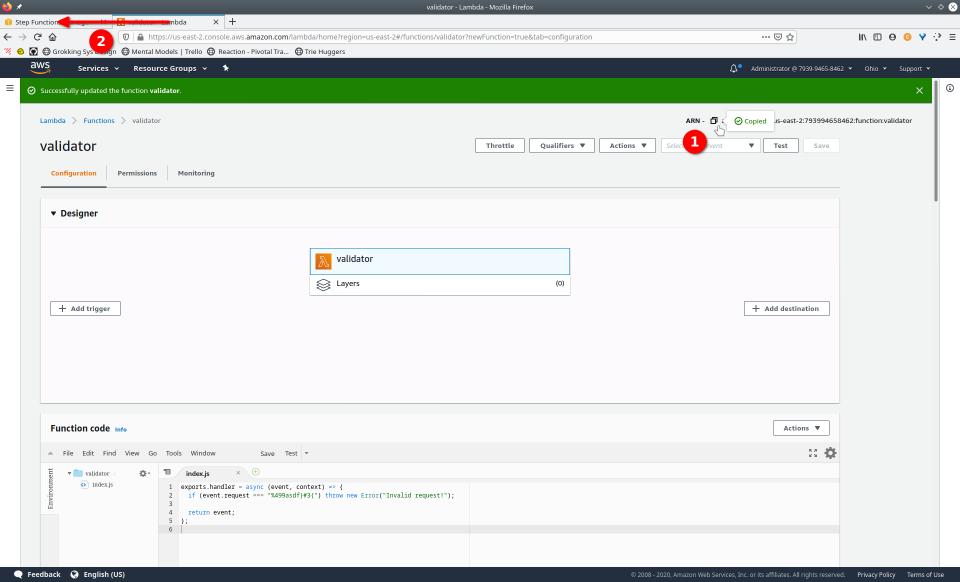
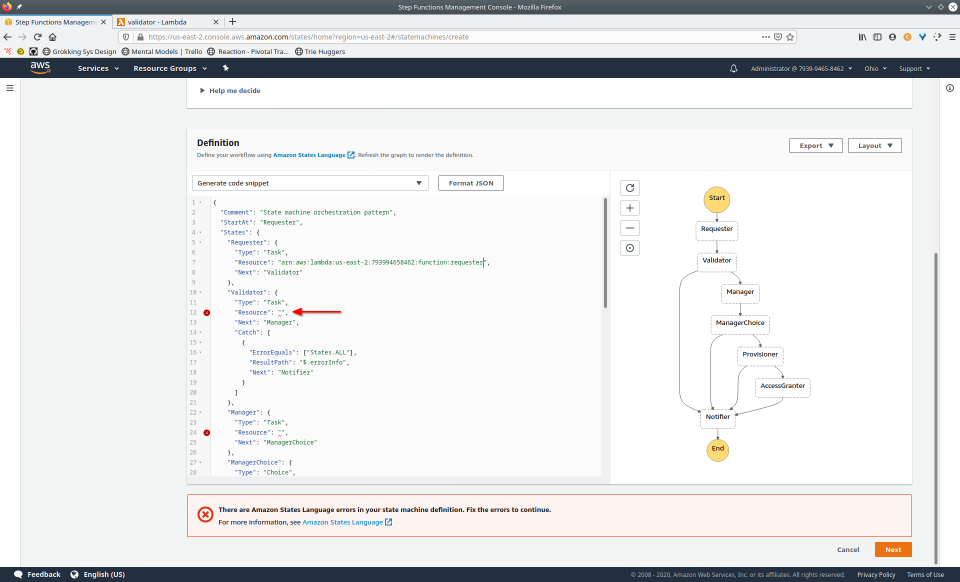
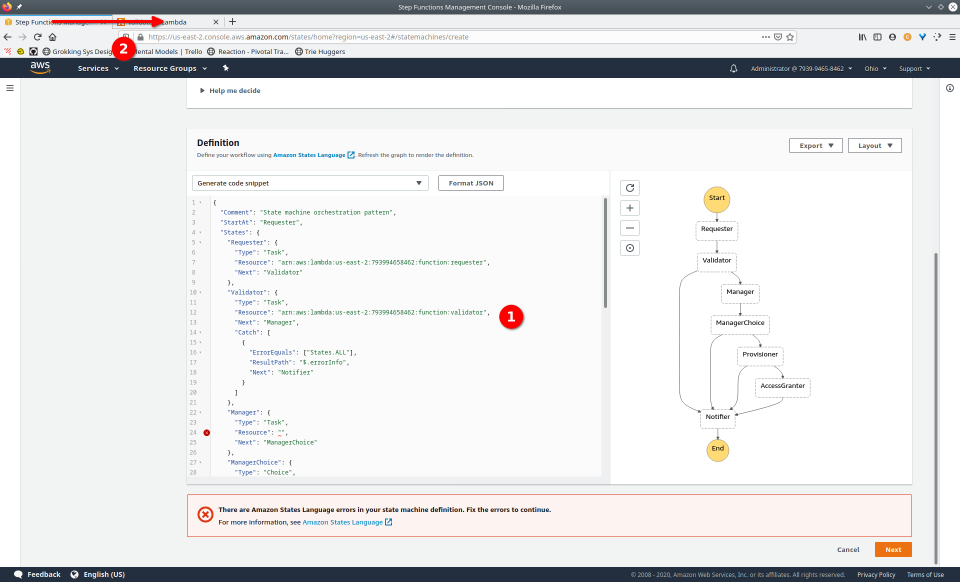
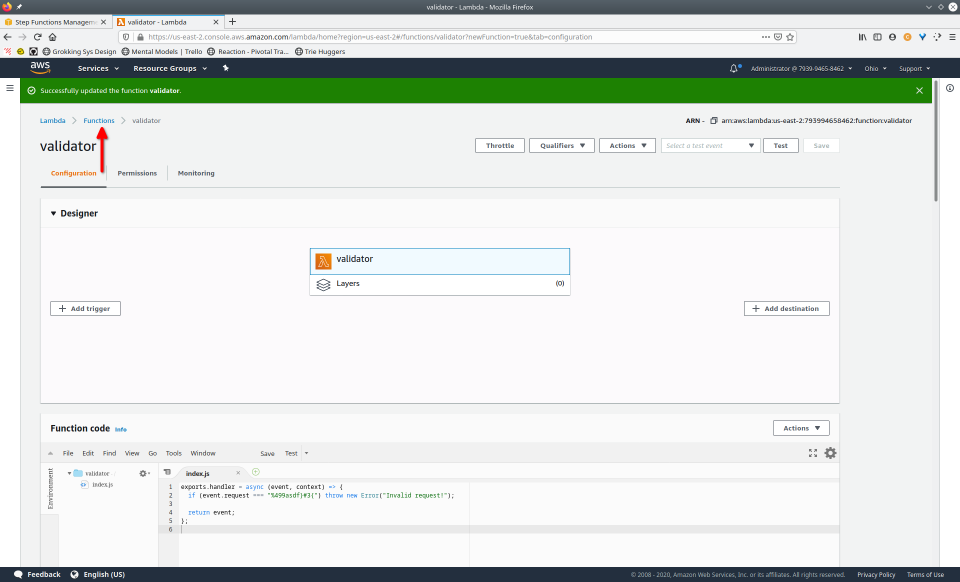
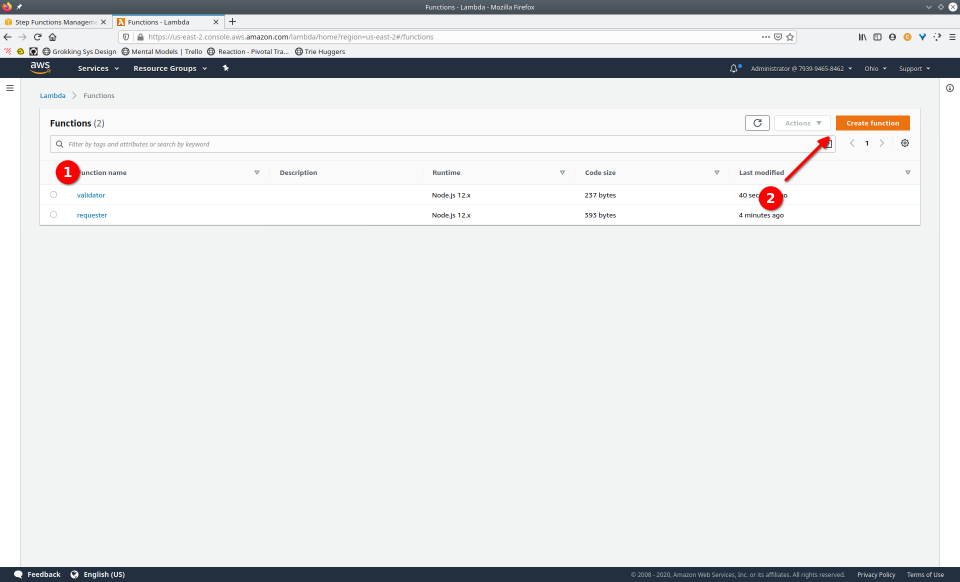
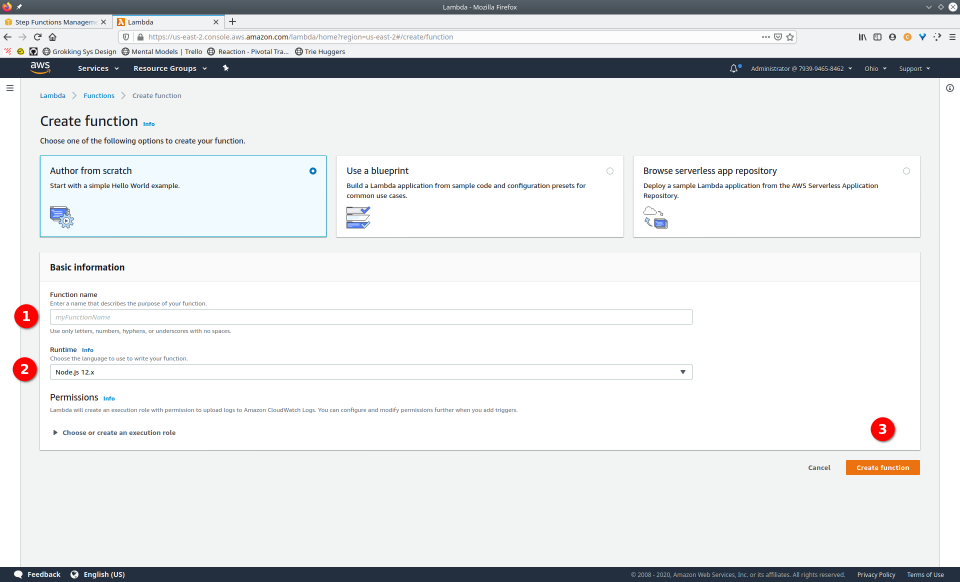
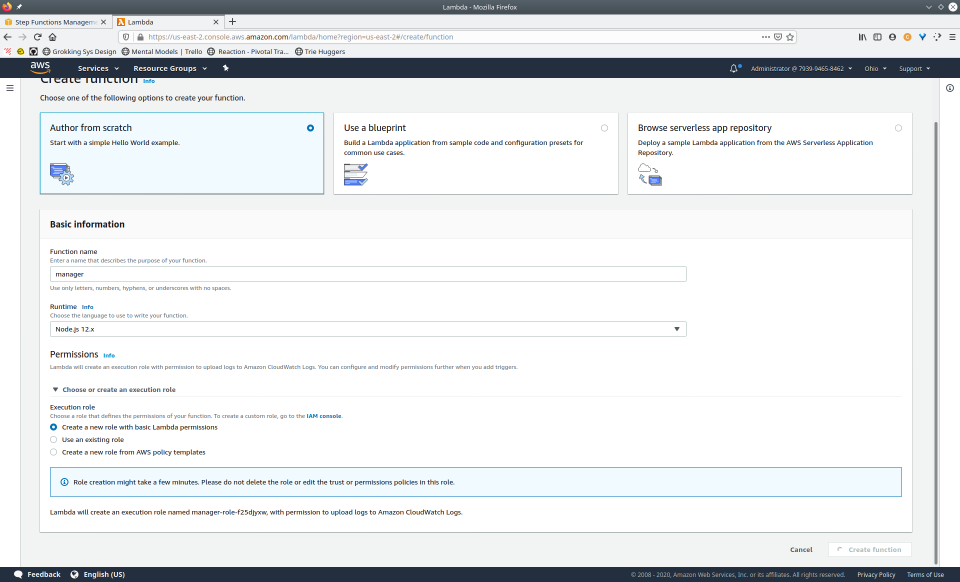
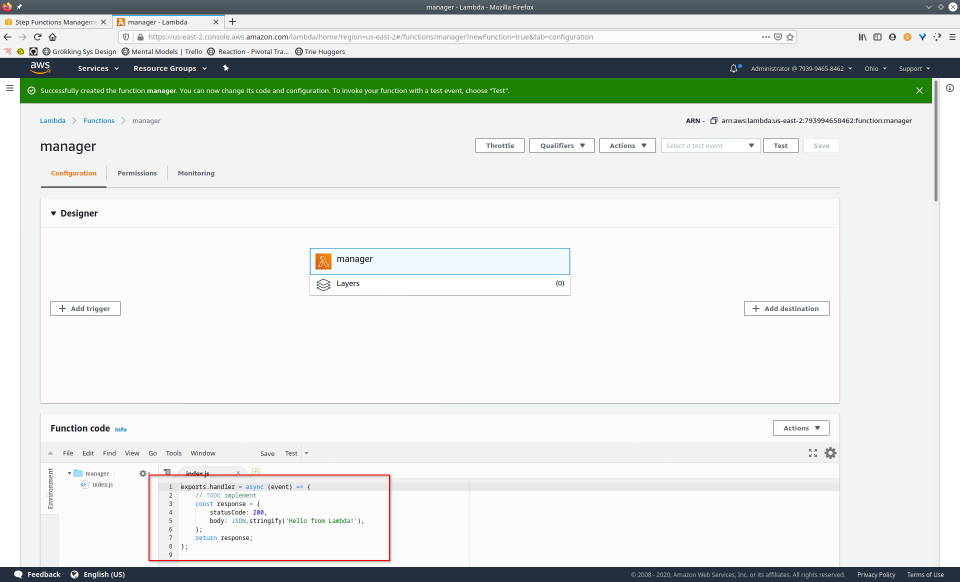
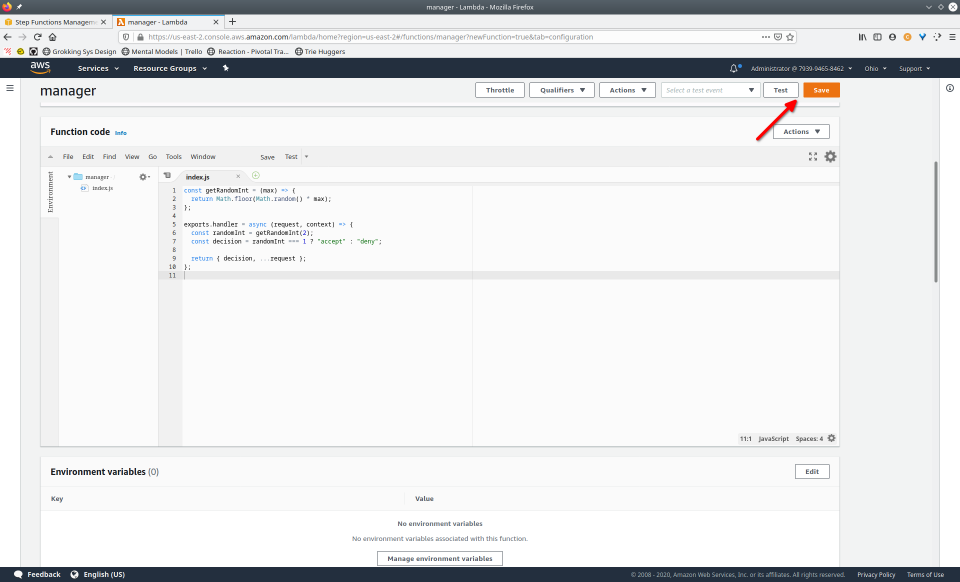
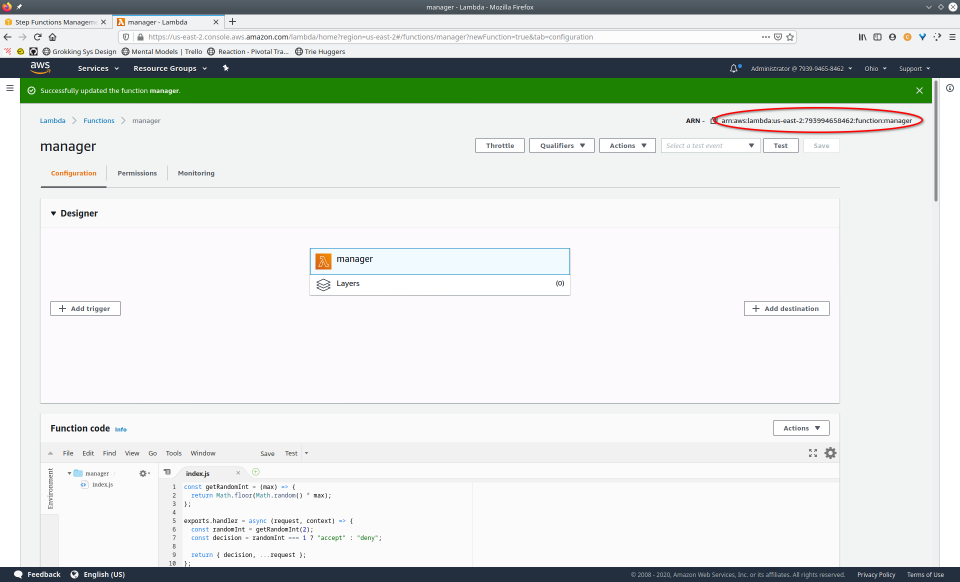
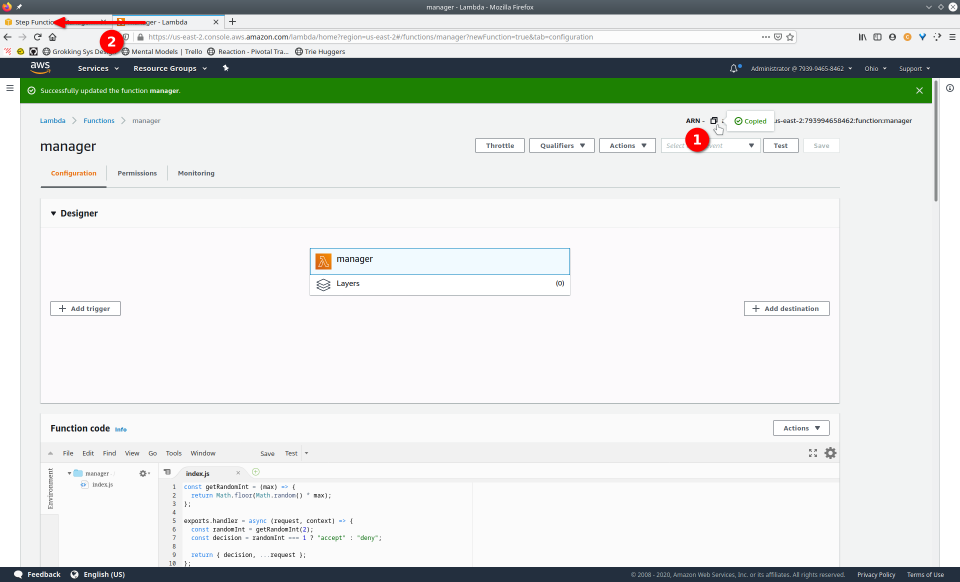
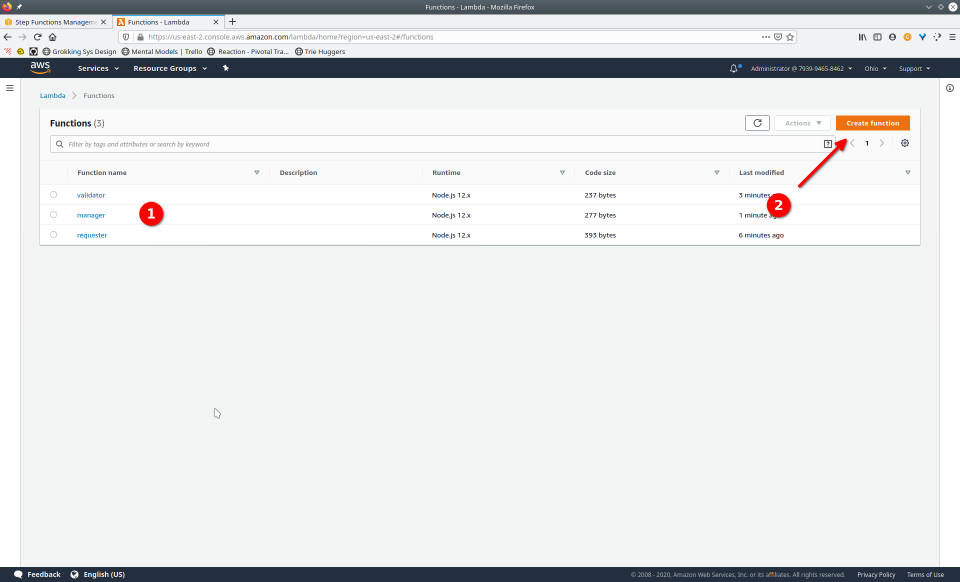
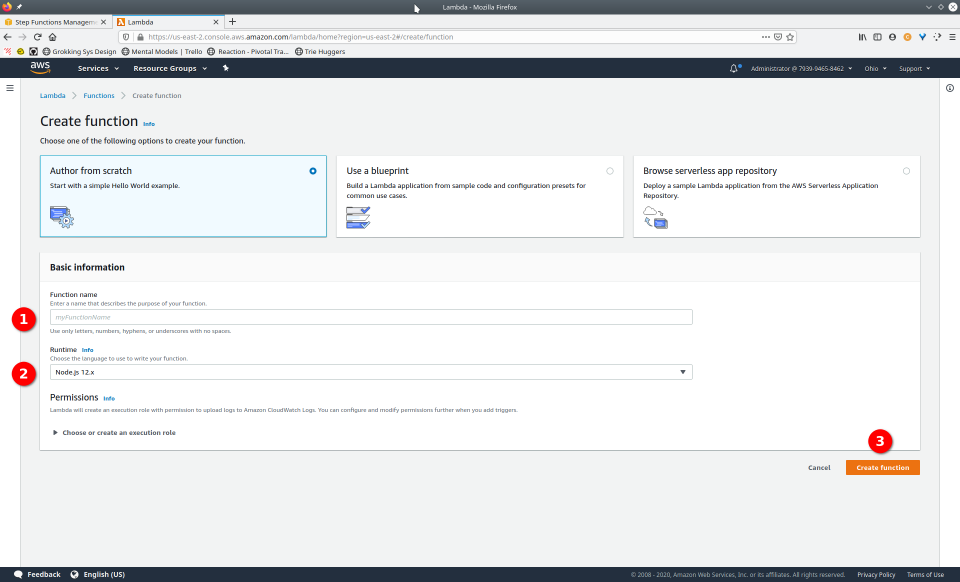

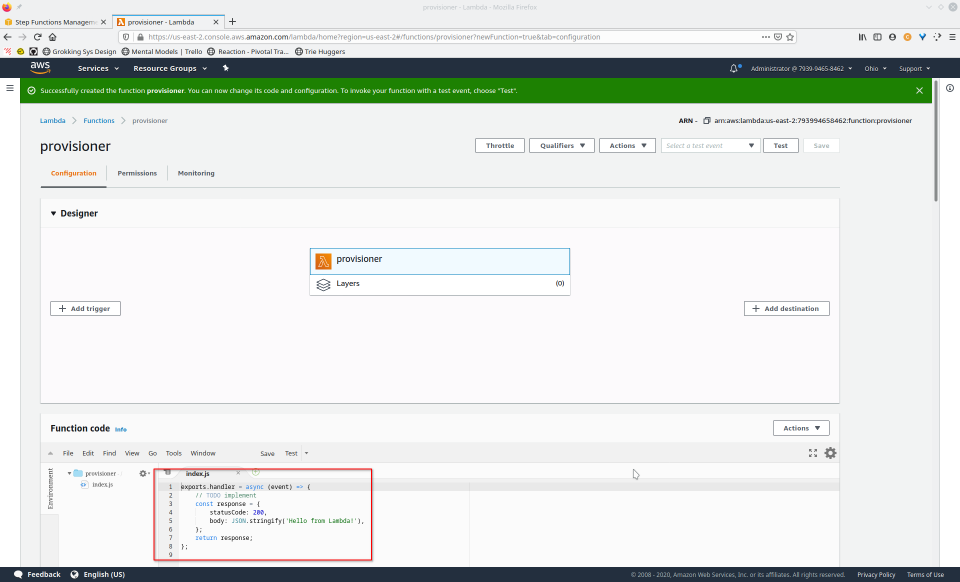
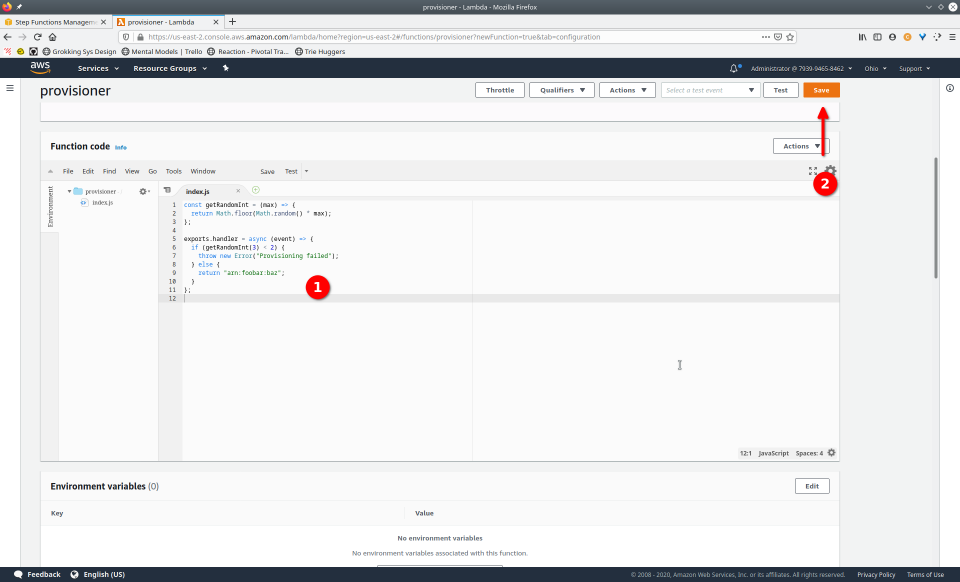
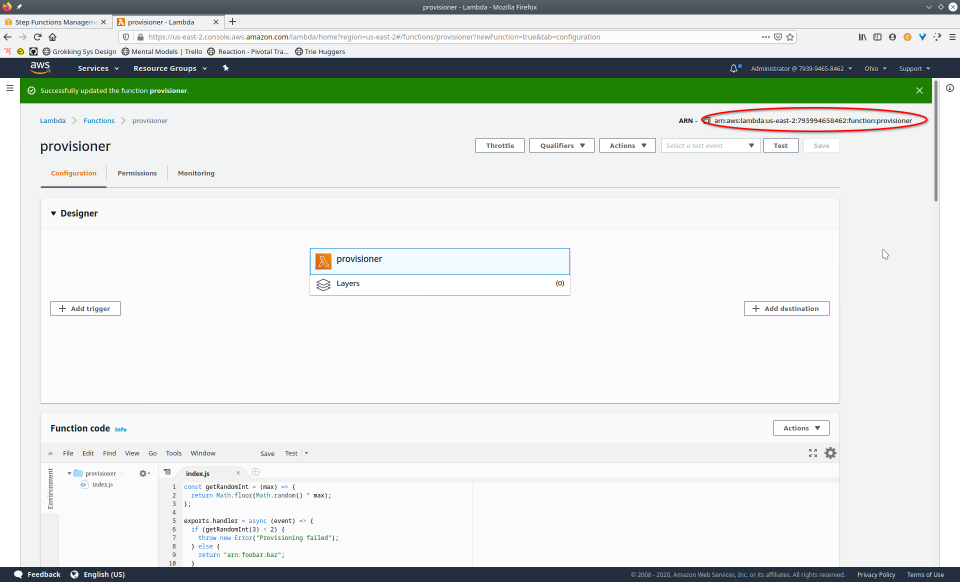
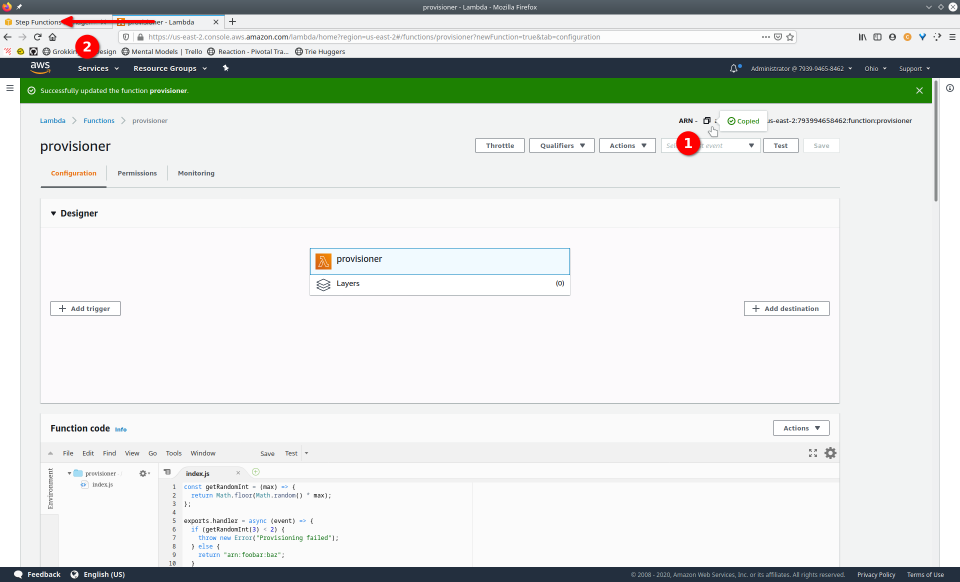
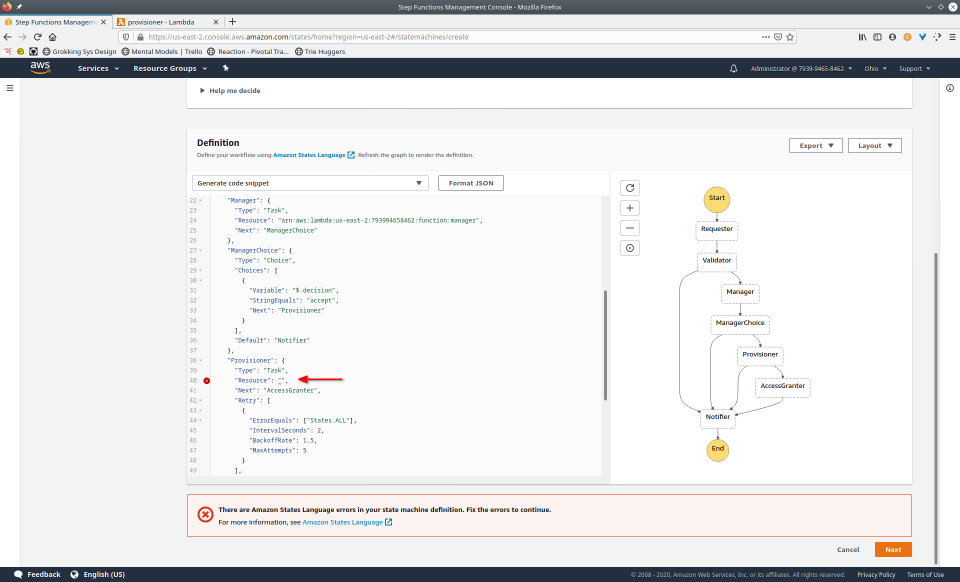
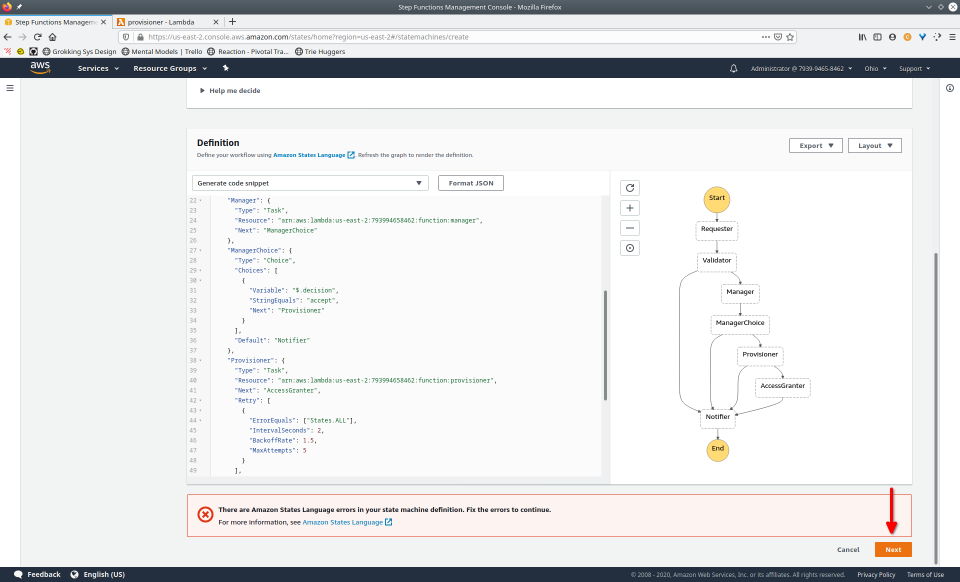
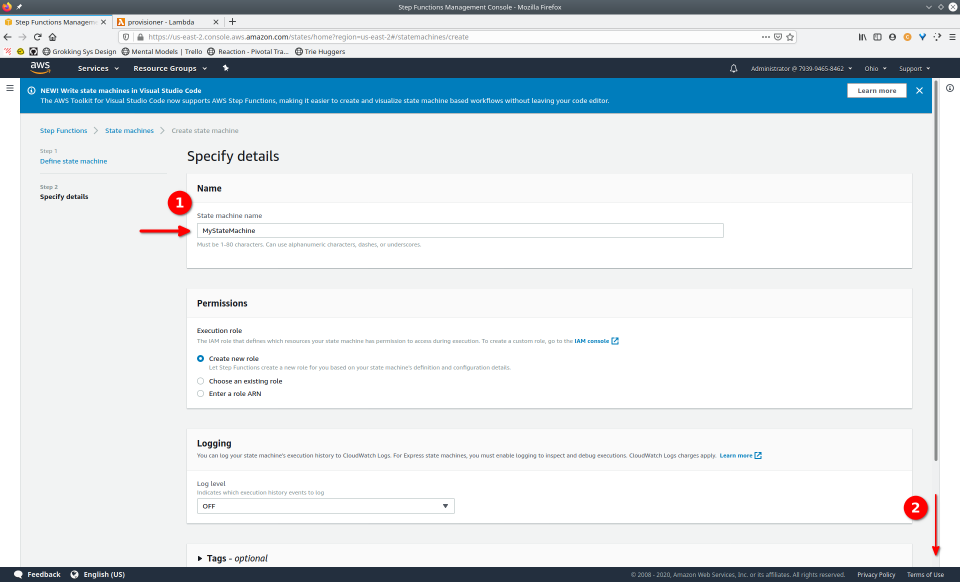
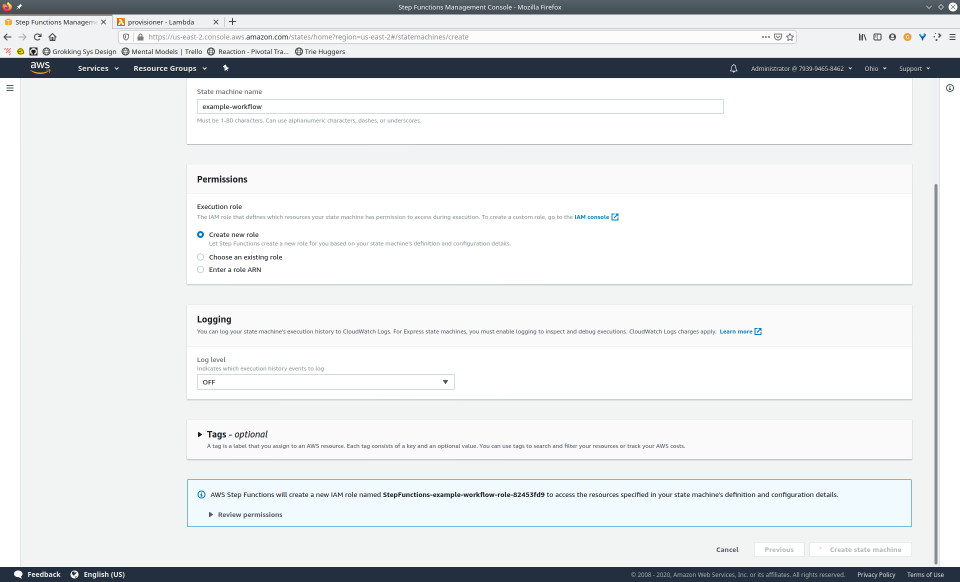
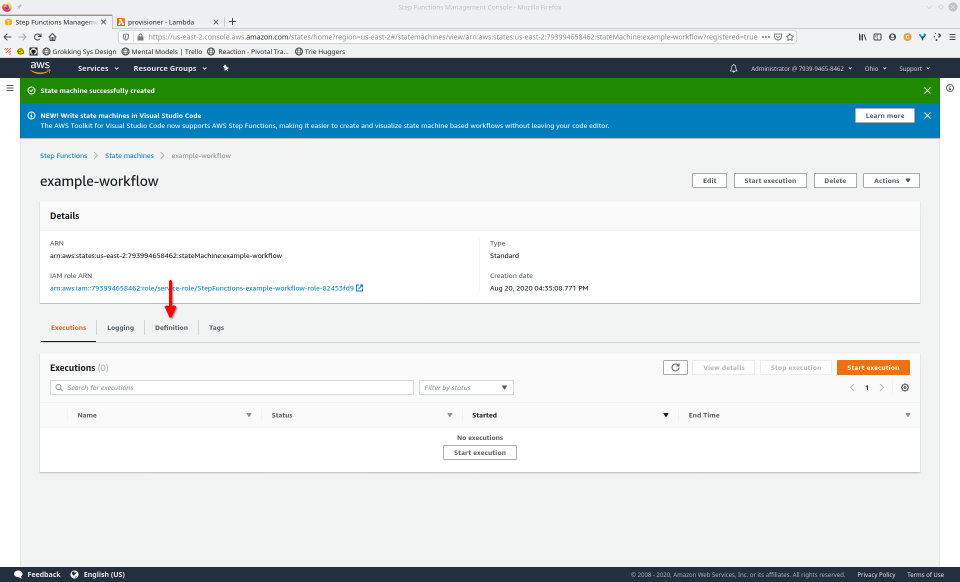


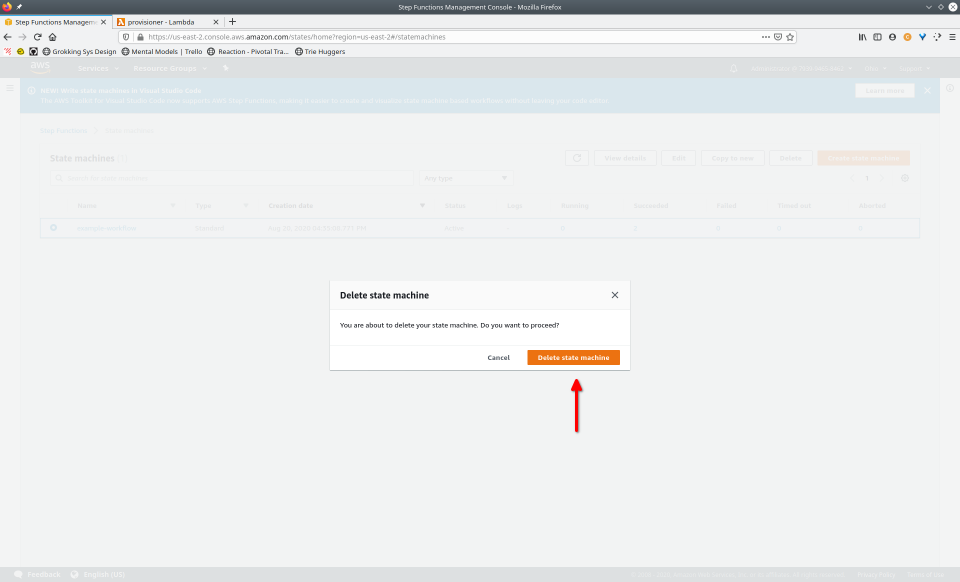


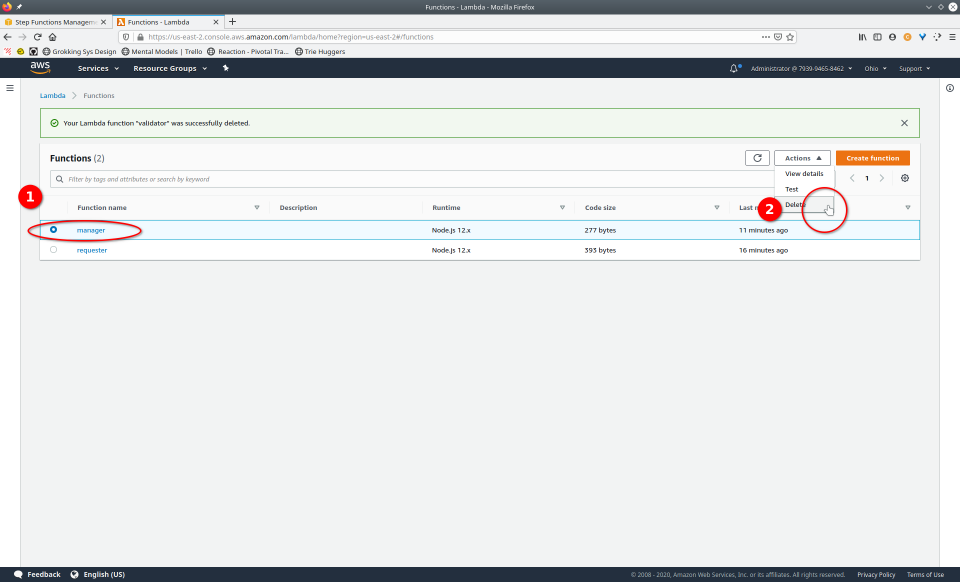


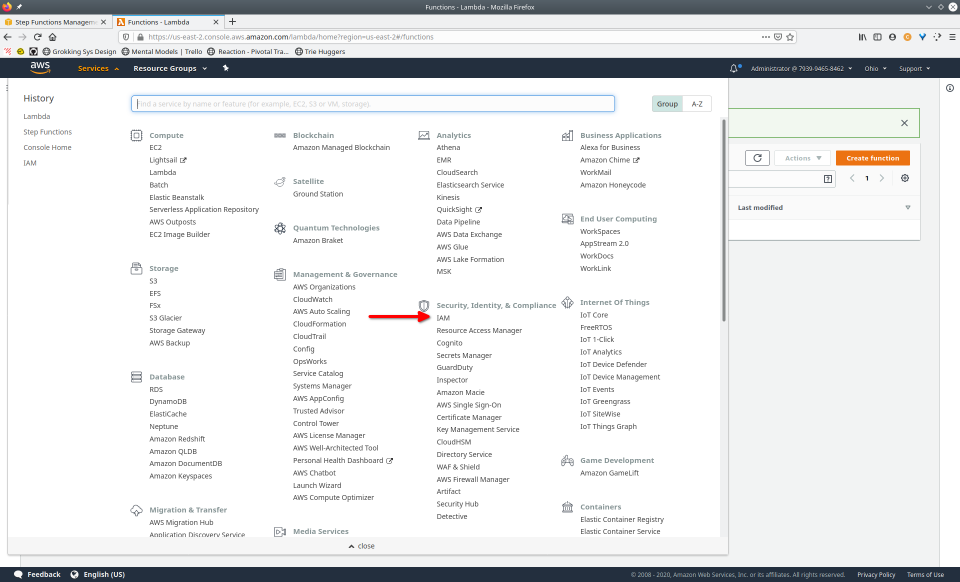
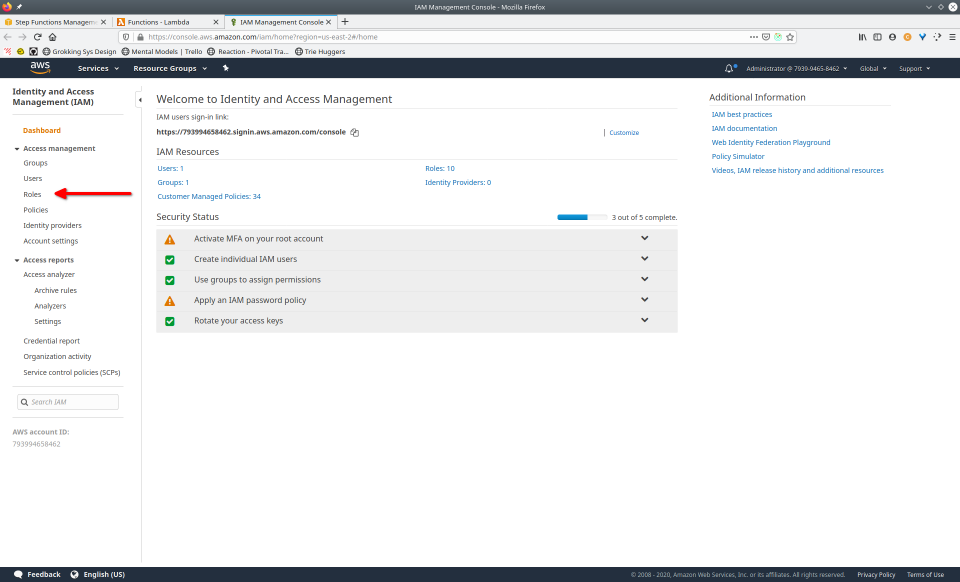
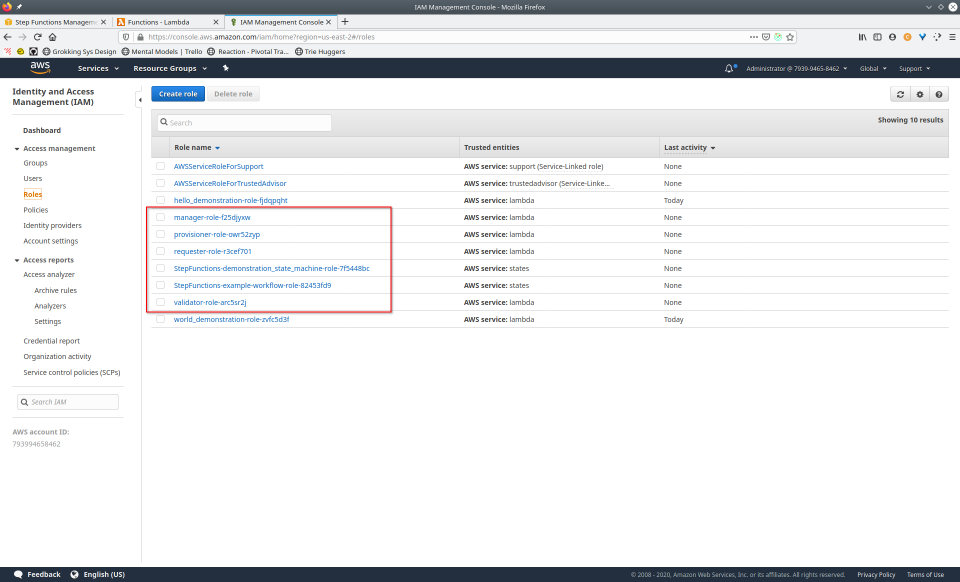

To recap those 93 slides, here are the 15 major steps to deploy:
- Navigate to the Step Functions console
- Select “State Machine”
- Select “Create State Machine”
- Provide ASL definition
- Conditionally modify
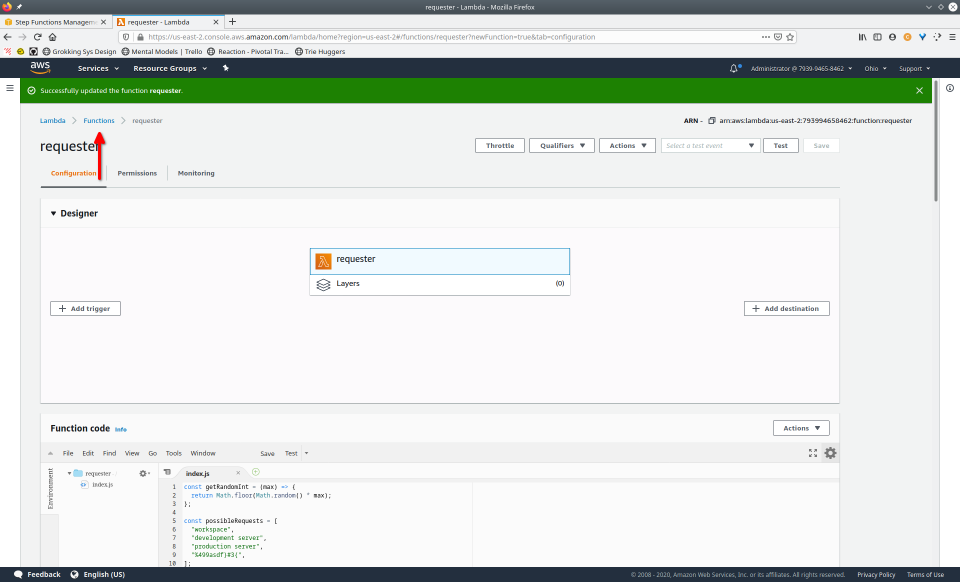
- Navigate to Lambda console
- Configure Lambda (runtime, name, permissions, etc.)
- Define Lambda
- Save Lambda
- Copy Amazon Resource Name (ARN)
- Paste valid ARN into state machine definition
- Repeat steps 6-11 for each Lambda
- Save state machine definition
- Navigate to and fill out name, tags, logs, etc.
- Deploy state machine
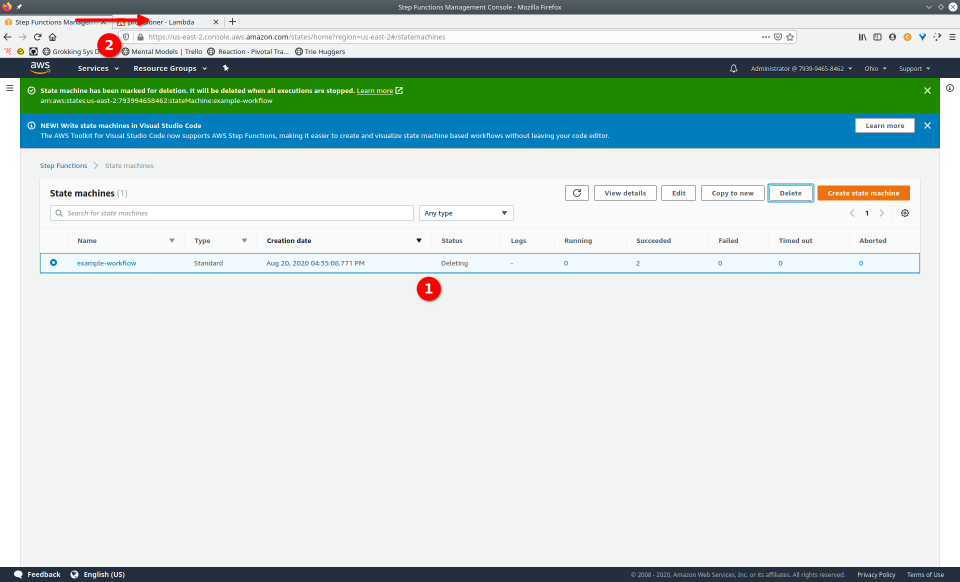
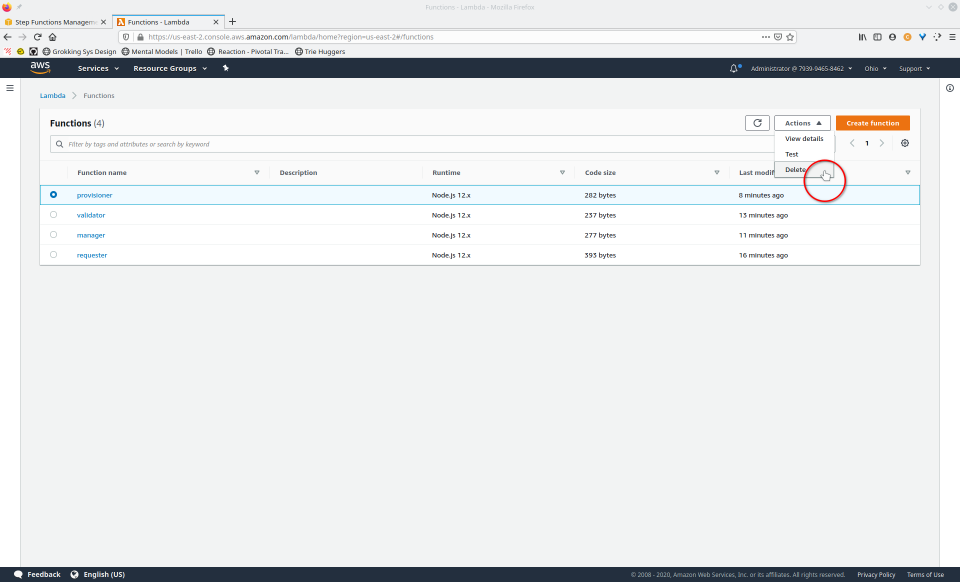
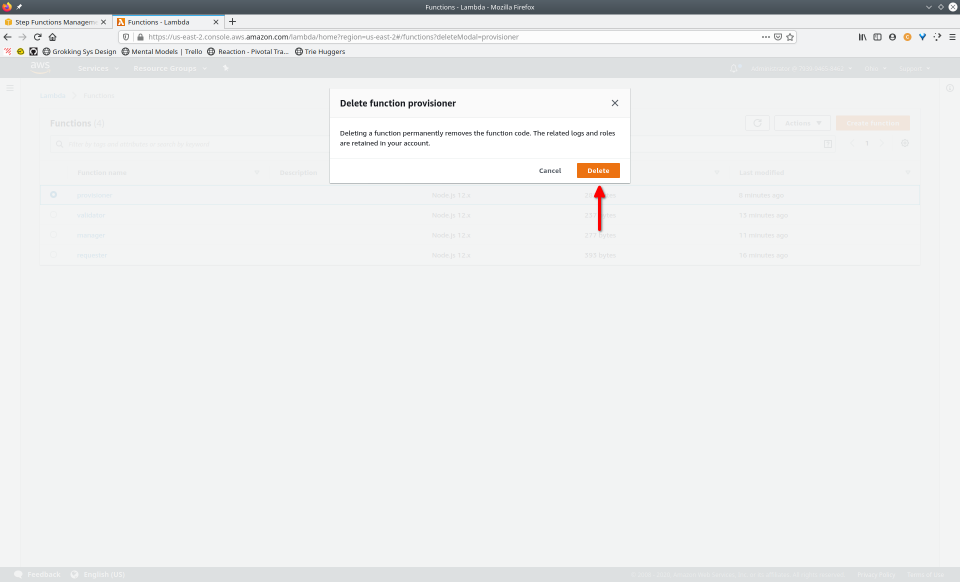
And here are the 9 major steps to tear down:
- Navigate to the Step Functions console
- Click the “Delete” button, confirming any popup
- Navigate to Lambda console
- Select a Lambda
- Click the “Delete” button from the “Actions” drop-down menu
- Confirm deletion
- Repeat steps 4-6 for each Lambda
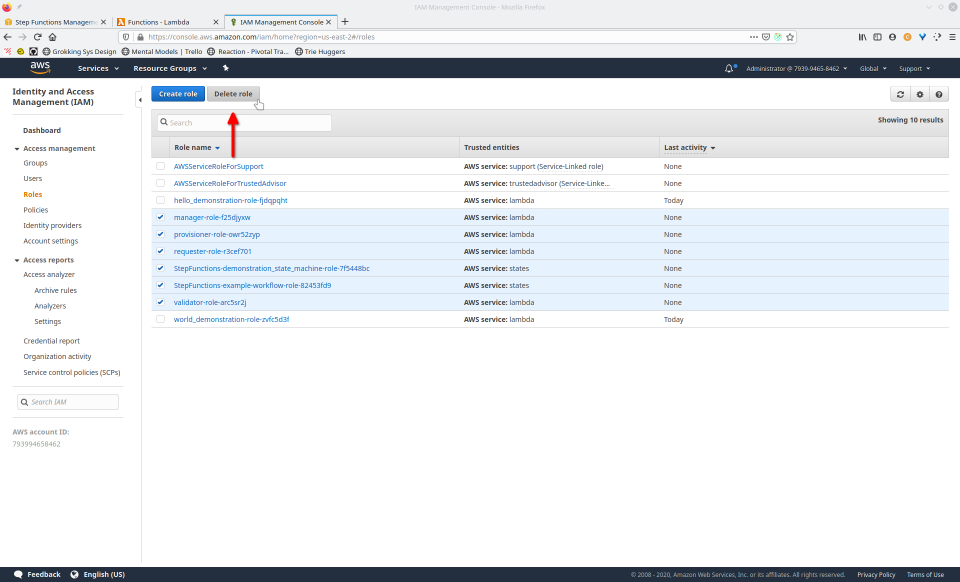
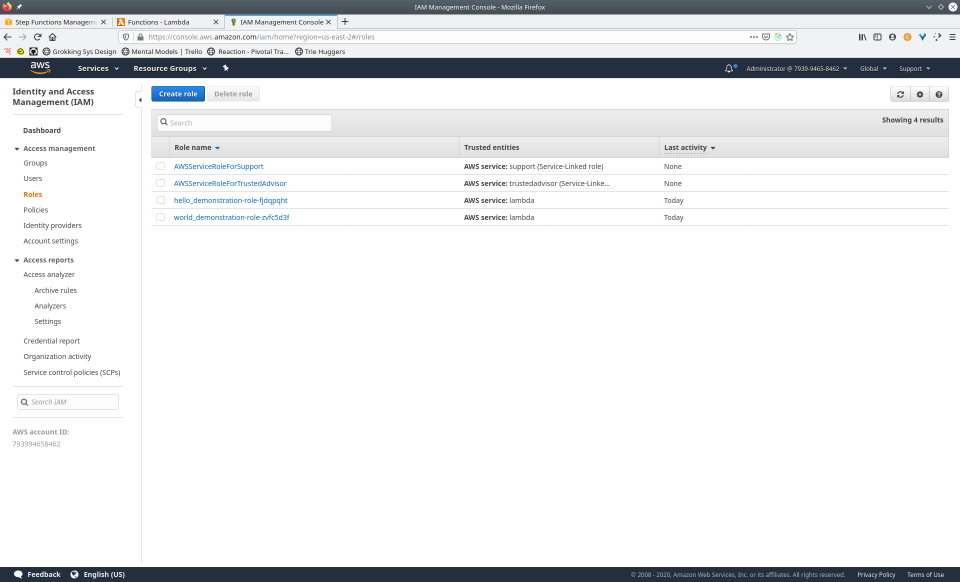
- Navigate to the IAM console
- Navigate to “roles”, select the roles, then click the “Delete role” button, confirming any popup
Now, the same process but using Maestro:
To recap that video, here are the 3 major steps to deploy:
- Open your terminal, execute
maestro new - Edit your workflow
- Execute
maestro deploy
And here is the 1 major step to tear down:
- Execute
maestro teardown
The difference between using the AWS Management Console vs Maestro is quite a stark one. What took 24 steps across all resources to create the workflow (not to mention deleting) takes just 3 with Maestro, all in the comfort of your own terminal. And when considering the 2-3 min deployment time of AWS SAM, the 3-step, 3-second deployment time and 1-step, 2-second teardown time of Maestro is unbeatable and wildly refreshing to work with.
In addition to its lightning-fast deploys and teardowns, Maestro has robust manual (man) and inline help (discussed in the table below)
7.1 Commands
Out of the box, Maestro comes with 6 simple commands:
| Command | Description |
|---|---|
|
This command creates a new Maestro project with the given
project name. When
If the user simply presses |
|
This command must be executed at the root of your Maestro
project. It will deploy both the state machine as defined in
Typical deployment time is a lightning-fast 3 seconds. |
|
Executing this command with your working directory being the root of some Maestro project will tear down the associated resources from AWS, which are as follows:
|
|
Display help information about Maestro or a Maestro command. |
|
The
|
|
Fetches the Maestro default templates from git and installs them on the user’s local machine. |
7.2 Challenges
While we were building the Maestro framework, we came across a few challenges along the way, which we will now discuss.
7.2.1 AWS IAM
One source of difficulty was dealing with AWS IAM [17]. IAM is the AWS service that manages the creation of, deletion of, and management of roles, permissions, and policies that dictate what specific AWS services are allowed to do. Authorization is often a challenge in most programming environments, and AWS is no exception.
The first challenge that we, the Maestro team, ran into when working with AWS IAM was determining what set of permissions and policies must be provided to allow each component to execute properly. One would imagine that clear documentation regarding which permissions and policies allow execution of a given task would be easy to find, but that was not our experience.
To determine which basic capabilities the components in a standard Lambda-centric workflow required, we manually created some mock components and observed which policies AWS attached by default. This gave us a starting point for determining exactly which policies the Lambdas and Step Functions that Maestro deploys needs.
The second challenge regarding IAM that we ran into was the propagation of roles. While Maestro creates roles before it attempts to create the Lambdas and Step Functions state machines that depend on those roles, we still ran into problems regarding the roles’ availability. This is because, in order to attach a role to an AWS resource, the role must first propagate to every AWS data center, which can take upwards of 15 seconds. If one were to try to attach a role to a Lambda before the role had a chance to fully propagate, the role would not attach and would instead throw a cryptic error message. Unfortunately, there is no simple way to determine whether a role is ready for attachment or not. As of the time of this writing (Fall 2020), the best way to determine that is to try to attach the role to a resource (such as a Lambda) and see if the cryptic error message is thrown back.
Therefore, to create Lambdas and state machines with associated roles, we resolved to implement retry when attaching a role to a resource. Built-in retry does not exist in the AWS SDK, so we created our own robust and general-purpose retry function that handles the number of attempts and the backoff rate between subsequent attempts. The retry, in combination with an initial sleep period and tuned backoff rate, solved this challenge and made Maestro even more robust than before.
7.2.2 Asynchronicity
Creating multiple AWS resources that depend on one another in deployment touches on an overarching challenge that would need to be reconciled in developing Maestro: asynchronicity. Maestro offers quick deployment thanks to concurrent creation and deployment of resources which requires navigating numerous issues related to synchronicity.
A helpful pattern that allowed us to work with asynchronous functions
and Promises was the ‘async/await’ pattern. This allowed certain
actions to be treated synchronously in an asynchronous context.
However, the Maestro philosophy was not to completely remove Promise
chains by dogmatically applying the ‘async/await’ pattern everywhere
possible. Overuse of the pattern can cause code to be slow by
essentially making every step synchronous [18]. To achieve relevant concurrency in creating resources, a mixture
of ‘Promise chains’, ‘async/await’, and
Promise.all was
implemented. The result is a lightning-fast framework.
7.2.3 Domain
Serverless orchestration is a very niche topic. Although AWS Lambda is a popular service, orchestration is often done company-by-company without adhering to a common set of shared best practices. Navigating common approaches required extensive, in-depth inquiry. Further, AWS Step Functions offers many benefits but is not broadly used; as a result, few frameworks or solutions exist to provide insight into development. Therefore, we had to be quite innovative to provide a framework in this space.
7.3 Future Work
As with most endeavors, not all that was desired could be accomplished from the outset. Here are a few aspirations that are left for future work.
7.3.1 ASL Wrapper
Ultimately, a framework that works with ASL could be benefited by abstracting away the awkward language. As was previously described, the objective of Maestro is to facilitate working with ASL through templates. However, no set of templates can be comprehensive, and any developer working extensively with Step Functions will eventually require writing ASL. Having an ASL ‘wrapper’ to imperatively write ASL in native JavaScript would be helpful.
7.3.2 Logging
Another possible future addition would be integration with the host logging system. More robust logging is helpful in the event something goes wrong with the deployment of an individual component or an entire workflow.
7.3.3 Versioning
Because the premise of Maestro is to allow rapid iteration on workflows, versioning comes into view. Much consideration must go into determining the point at which a workflow is ready for production, and due to innumerable circumstances, a team may resolve to look back at some previous version of their application. Ideally, a version of the workflow would be persisted and easily accessible every time a workflow was deployed.
7.3.4 Redeploy Command
Which brings to mind another consideration left for the future: a
maestro redeploy
command. It would be helpful, especially for complex workflows, to
intelligently re-deploy only elements of the workflow that have
changed since the last version. If versioning were clearly outlined,
then re-deploying could look back at a snapshot of the workflow to
determine what changed and then re-deploy accordingly. This would help
preserve artifacts in AWS that provide auditability of long-standing
components as well as reduce the load on the network.
7.3.5 Multiple AWS Services
The focus of Maestro is AWS Lambdas, but that doesn’t have to be the case. While much can be achieved, and often is, strictly using Lambdas, other services offer a broader range of development possibilities. Integrating further AWS services into Maestro would amplify its potential.
7.3.6. Per-Project Configuration
Currently, Maestro only uses a single global configuration file. It would be beneficial to have a unique config file for each project allowing deployment in various regions and even to different AWS accounts. On a similar note, a developer may wish to use different Node.js® runtimes, so support for various versions could be added.
8. References
- A mixed-method empirical study of Function-as-a-Service software development in industrial practice
- AWS Lambda - The Ultimate Guide
- Patterns for Serverless Functions
- Serverless Workflows using Step Functions
- What Is AWS Step Functions?
- AWS Step Functions - The Ultimate Guide
- YAML Is Better than Your Favorite Language: Fightin’ words about Infrastructure as code | Ben Kehoe
- AWS Management Console
- AWS Cloud Formation
- Start building with SDKs and tools
- Serverless Framework
- Serverless Framework Comparisons
- Step Functions plugin for Serverless Framework
- AWS Serverless Application Model
- AWS SAM adds support for Step Functions
- Step
- What is IAM?
- Async / await
- Comparison of FaaS Orchestration Systems
- FaaS
- Serverless Event Scheduling — Using AWS Step Functions
- How are serverless computing and Platform-as-a-Service different?
- Guardian News & Media Automates Subscription Fulfillment Using AWS Step Functions
- Building self-healing, observable systems with AWS Step Functions
- AWS Step Functions - The Power of Simplicity
- Breaking down the monolith with AWS Step Functions
- SOSW
- Serverless Smart Radio
- What is Serverless Architecture? What are its Pros and Cons?
- What is AWS?
- Youtube tutorial for deploying with Serverless Framework
- Amazon States Language Specification